If you’re like me, then you probably like to keep things in your fleet fresh and exciting. This can be as simple as a quick and easy mod to the frame that makes something easier or a new piece of bling to kick it up a notch. Well, next time you’re thinking about dropping a ton of money on something to make your heli look different, consider de-anodizing one of your stock colored aluminum parts.
The process I’m going to show you will allow you to restore your boring old colored aluminum parts to a clean, bare-aluminum shine and it only takes a bit of patience and some sodium hydroxide… 😉
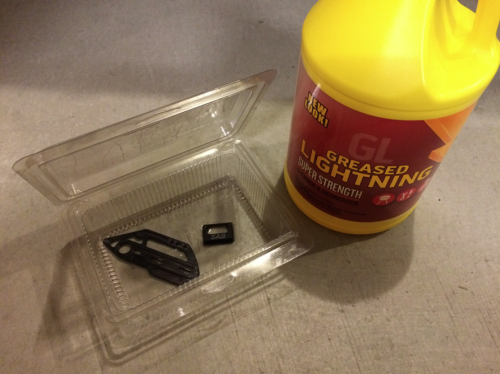
Start out with choosing an aluminum part that has been color anodized. You can de-anodize any color and any piece big or small, so feel free to pick whatever you’d like to change up! For this example, I chose to de-anodize the aluminum tail case parts on my Goblin 770 and Goblin Speed. Now for the chemicals! Get a jug of Greased Lightning (sodium hydroxide cleaning agent), which can be purchased for about $8-10US at any hardware or home store. I got my bottle from Home Depot for $7.99! 🙂
Next, get yourself a plastic or glass container that can be filled to a depth that will completely submerge the aluminum part and another container into which you can use to pour the “used” solution. Set up a third nearby container that has clean water in it for rinsing the part between “dips.” Finally, get yourself a kitchen sponge or some scotchbrite to help remove some of the more stubborn anodizes.
Ok, now we’re ready to go…
First, make sure that the part has been completely broken down to its simplest form. In other words, make sure there are no fasteners, bearings, or any other parts attached to it. Then clean it up with some warm soap and water to remove any grease or oil, as these contaminents will make it more difficult to remove the anodize.
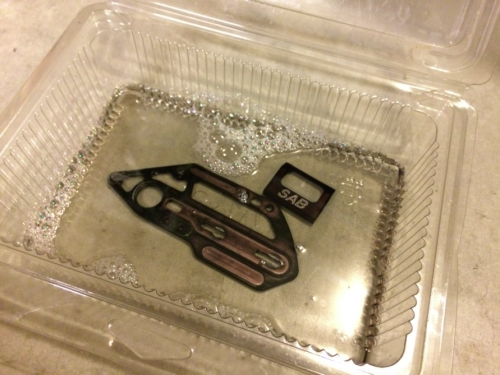
Put your part into the first container and pour in only enough Greased Lightning to cover the part fully. You should begin to see the color fade and the surrounding liquid take on the color of the anodize within the first minute of submerging the part.
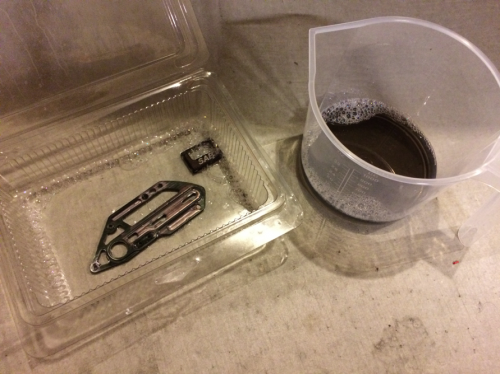
Agitating the solution will help the process along, so give it a little nudge now and again or if you’re using a container that can be sealed, then shake the hell out of it! 😀 Once the solution has become richly colored with the anodize, dump it out into your second container and immediately rinse the part off in your clean water container. Now, drop it back into the first container, refill it with Greased Lightning, and do it all over again!

Depending on the thickness of the original anodize layer, you may need to do this cycle several times. I’ve seen it take anywhere from two or three cycles to fifteen or twenty depending on how complex the part geometry is… The ones that take longer usually benefit from a bit of elbow grease in the form of a scrubbing sponge or scotchbrite.
If you leave the part in the solution too long and with sufficient color concentration, then it will begin to oxidize the surface of the aluminum and redeposit some of the color. This can usually be rubbed off with your fingers and some clean water, but if you’ve forgotten it for a while, then it will need to be re-done in a new batch of Greased Lightning.
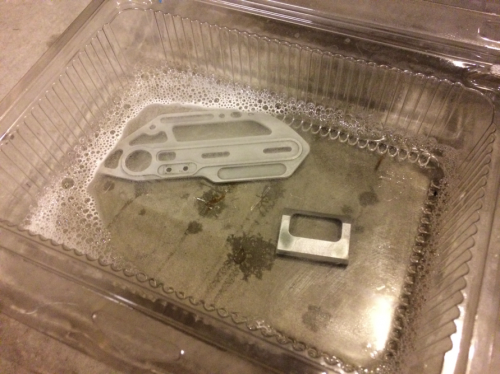
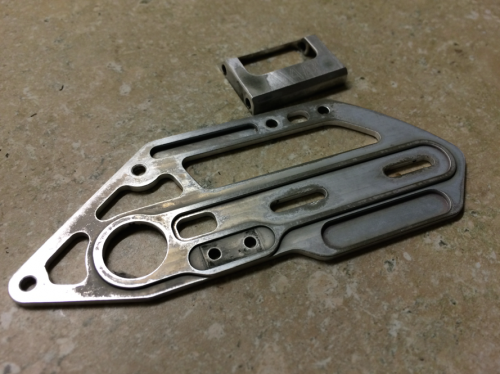
Once you get down to what looks like bare aluminum, you’ll start to see the solution bubble on subsequent cycles of clean sodium hydroxide. This is perfectly normal and just indicates that it’s really getting into all the nooks and crannies.
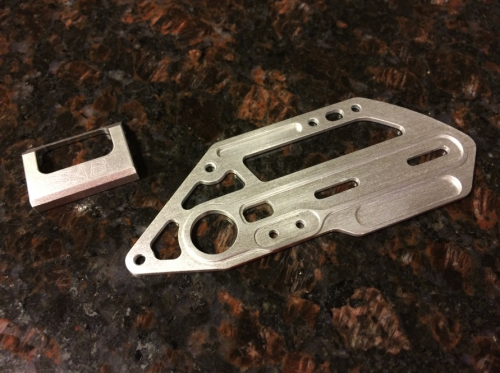
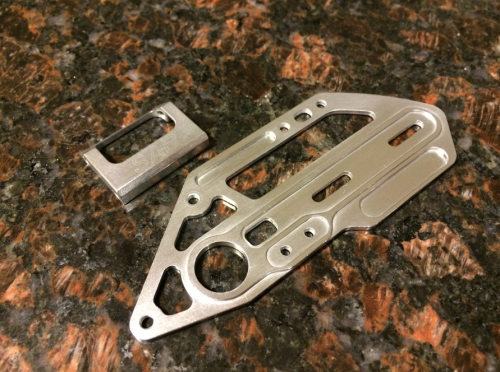
Once the part has been cleaned to your satisfaction, wash it off with soap and water and dry it. At this point, you can reassemble it if you like its appearance or you can polish it a bit. I prefer to use Mothers Aluminum and Magnesium polish (get it at your local auto parts store) to polish up bare aluminum parts and bring out that shine!
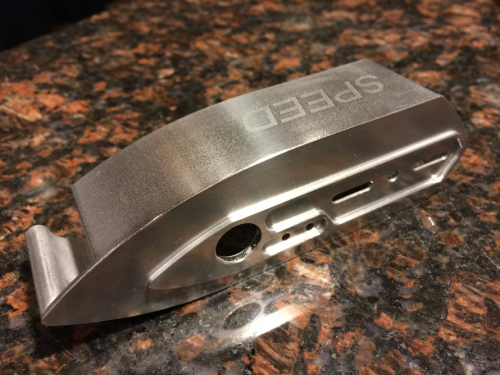
Get creative with it and you’ll be able to turn your heli into something truly unique! Enjoy!
– Justin