Many times in this hobby, I have found myself needing to drill and tap a hole. Whether this is because the previous hole is stripped and I want to install a larger screw or maybe I need to pin the tail case on to the tail boom. One situation I ran in to recently was that I wanted to increase the size of the elevator pin on the swashplate of my Compass 7HV. Although drilling and tapping might seem very straightforward, there are some tips and tricks that can help you achieve those perfect threads!
The first thing you will need to do is determine the diameter of the threads you want to achieve. Once that is done, you will then need to go to a tap and drill chart to ensure you have the correct size drill bit. When reading the chart, you will see in the left column the screw size in millimeters. The most common sizes in our hobby are 2mm, 2.5mm, 3mm, and 3.5mm. Then under the Tap Drill heading you will need to choose which material you are planning on tapping
The reason for choosing the material is because for softer materials such as aluminum and plastics you want the threads to be deeper than the threads in steel. Once you have decided on the material, you will go down to the box that correlates to the screw size. This will be the size of the drill bit you will to use to drill the hole. For reference, you can see that the chart also shows the closest standard sized drill bit incase you have a standard set.
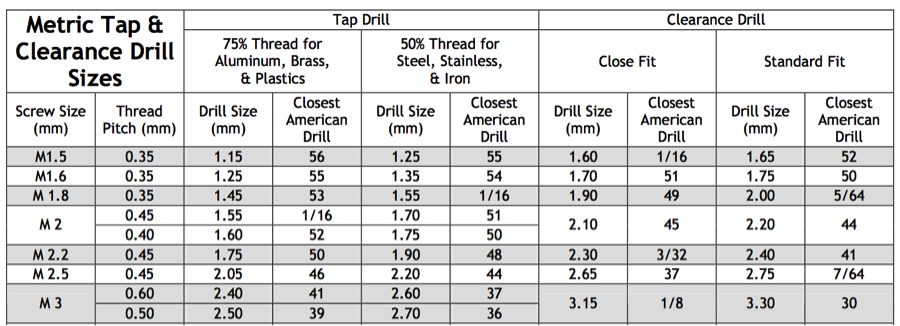
https://littlemachineshop.com/Reference/TapDrillSizes.pdf
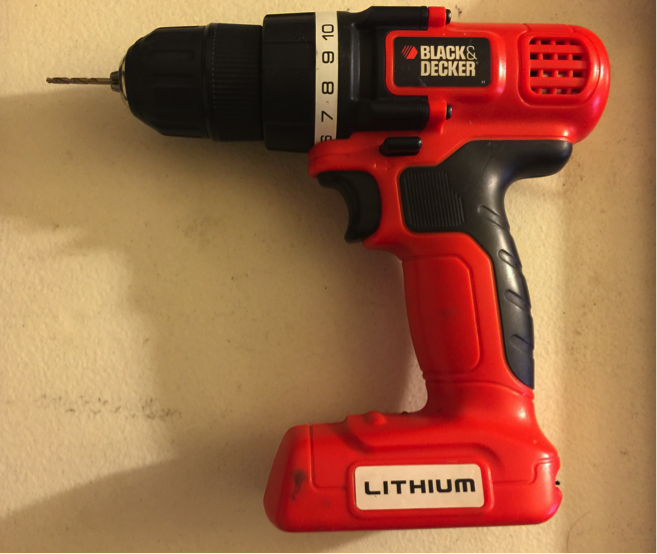
Now that we have the correct bit, it’s time to drill the hole. If you are enlarging a pre-existing hole, this is fairly straightforward since the hole should already be square with the part, assuming the original machining was correct. If you are planning to drill a new hole, you will want to make sure that the piece is well supported and you keep the drill bit square to the work piece the entire time. When drilling the hole, one other thing to consider is the depth. Are you going all the way through or only to a set depth? All of this will depend on the part you are tapping, but these are all things to be aware of so you don’t make a mistake. Using a drill press makes all of this much easier, but it can be done with a handheld drill as well.
Now that the hole is drilled, it’s time for the tapping. The first thing is to choose the correct type of tap. Usually this is going to be a standard tap or a bottoming tap. If you drilled a hole that doesn’t go all the way through the work piece then you will want a bottoming tap otherwise a standard tap will be fine. When buying a tap, I tend to go with a coated high-speed steel version so that I’m not limited on which materials I can tap.

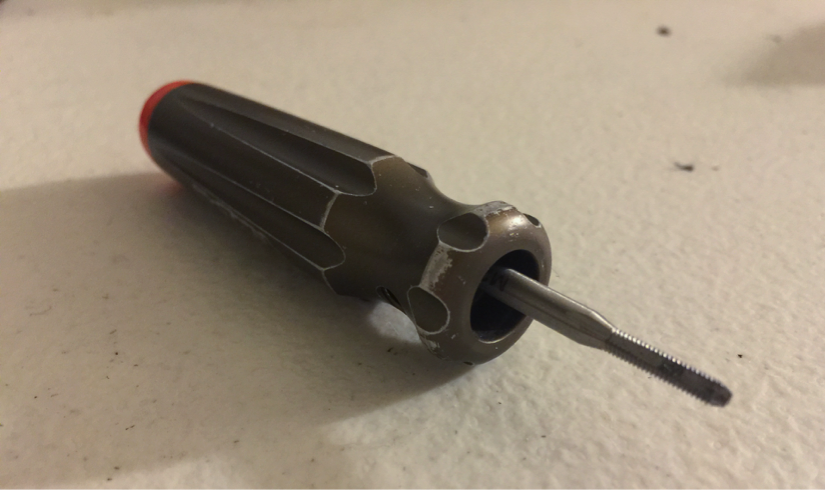
One thing to be sure of is that you have a good handle for your tap. There is nothing worse then trying to use a cheap handle that will not hold the tap tightly and keeps slipping. What I found works well as a makeshift tap handle is your standard heli hex driver. In my case, I have a set of Team Losi drivers where I can remove the tip by loosening a set screw. It just so happened that the tap fit perfect in the handle and I was able to retighten the set screw to secure it.
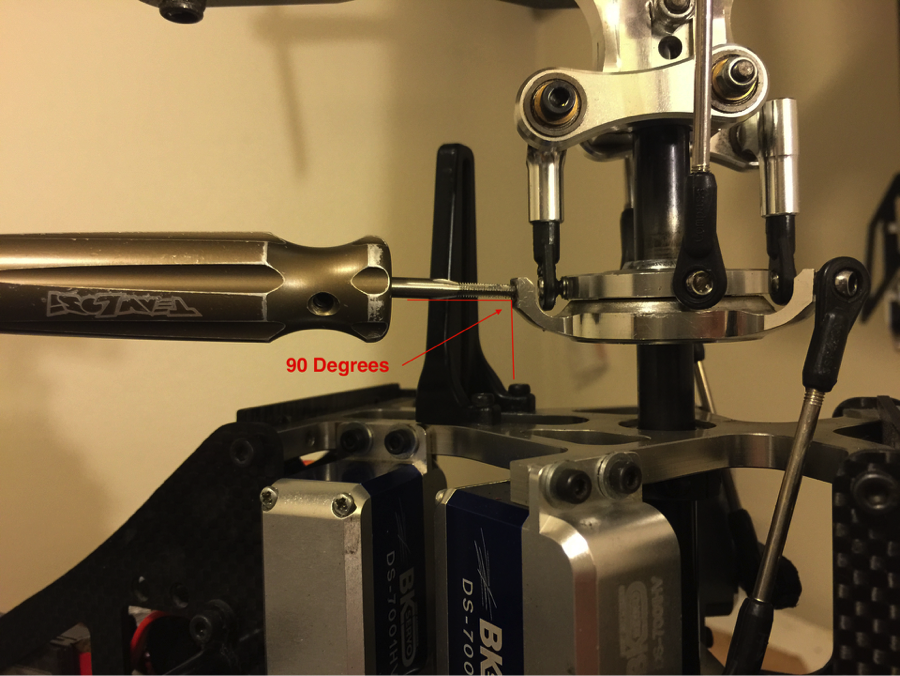
The next step is to find and use a proper lubricant, in my case I used scorpion motor oil, but any type of cutting fluid can be used. Now you will want to make sure the tap is square with the work piece when you start threading the tap in. Then you will just apply pressure and slowly start turning the tap in the clockwise direction. I usually apply a little cutting oil to the tap and in the hole.
There are a couple things to watch out for here… First, make sure that you keep constant pressure so the tap doesn’t strip. You want to make sure that as you turn the tap, it keeps progressing into the hole. The second thing is to make sure you clear the chips to prevent the hole from clogging up. What I usually do is 1.5-2 turns in the clockwise direction then 0.5 turns in the counter clockwise direction. When you do the counterclockwise turn ,this will break off and clear the chips. This helps ensure the chips get cleaned out and don’t mess up your threads.
You just need to keep doing this until you either reach the bottom of the hole or you pass all the way through the work piece. Then, once you’re done just simply thread the tap back out and you should see some nicely cut threads! Lastly you will want to make sure you use some rubbing alcohol (or similar) to clean out the hole otherwise the thread-locking compound won’t set up correctly and you run the risk of the screw loosening itself in flight.
That’s all there is to it! Being able to drill and tap a hole is a great skill that I’ve use my fair share of times and should add one more awesome skill to your DIY heli toolbox. If you have any questions feel free to shoot me an email at jessie@www.rchn.org.
-Jessie