Squeezing a set of packs down the narrow frames of some of the helis today can be quite difficult. Connectors can get snagged. Balance leads can get pulled apart. This is where stick packs can make what used to be a huge hassle become a complete breeze. They can completely change the way you look at your heli. The downfall is that not all batteries come in stick pack configuration. Well, we’ve got a solution for you. Make your own! Here’s a fantastic DIY that listener and friend Cris Trebbi did on how to make your own stick packs. Enjoy! – Nick
This tech tip will describe how I made my own stick packs with a fit and finish similar to their factory-produced counterparts.
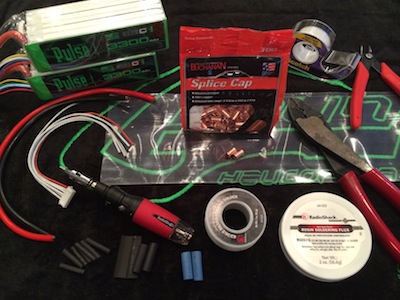
The items you will need are as follows:
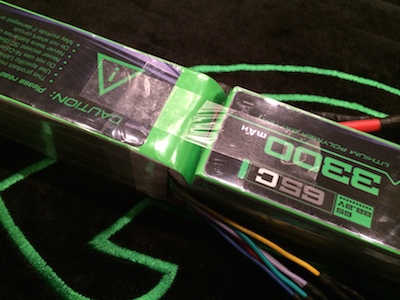
- • Two batteries of matching specifications
- • High quality fine-stranded wire for extending main leads (usually 10awg)
- • Balance connector extensions (such as those made by Progressive RC)
- • Various sizes of heat shrink tubing
- • Splice caps
- • Transparent (Scotch brand or similar) tape
- • Solder & Flux
- • Large clear heat shrink for wrapping finished stick pack
You will also need the following tools, as well as some basic hand tools:
- • Soldering gun or pencil
- • Crimper (for non insulated connectors)
- • Wire cutters/strippers
- • Heat gun
*Note: The necessary splice caps are available in most electrical supply houses, as well as Home Depot and Lowes. They are commonly used to crimp together multiple ground leads in 110-volt electrical wiring. These caps will have one normal, and one “fluted” end which makes wire insertion a little easier*

In order to build this stick pack, you will need to extend the main power leads, as well as the balance connector leads of one pack. Once this is done, you will be able to place the modified pack behind the second pack, secure all the wiring in place, and then heat shrink the two packs together to make one neat, tidy package.
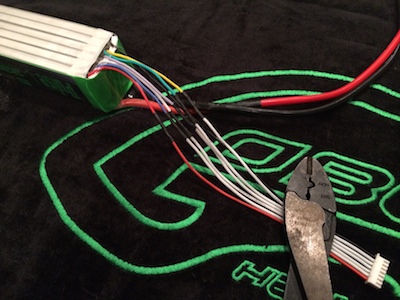
The first order of business is to extend the main power leads of one battery pack with a high quality, fine-stranded wire. This wire should be of similar gauge and quality to the battery’s original leads (usually 10awg).
***Make sure to only extend only one wire lead at a time, in order to avoid any chance of exposed wires touching, which could be VERY bad news!***
Be sure the negative lead is insulated on the end, so it cannot short out against the positive lead you will be working on. If there is not a factory-installed cap, you can insulate it with heat shrink or electrical tape.
First, strip off a bit of insulation from both the battery’s positive lead and the extension cable. I recommend stripping of just slightly more than will fit into the splice cap. This way, when the splice cap is crimped over the wires, there will still be a little bit of wire exposed. This will allow for easier soldering:
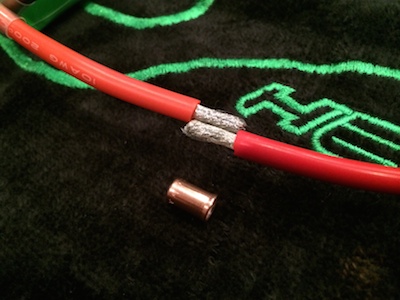
I recommend inserting the first wire from the non-fluted side of the splice. This way, the second piece (which is a tighter fit) will be a little easier to insert using the fluted side.

Next, use a little flux and a soldering gun to heat the splice cap and wire, and wick some solder down into and around the connector.
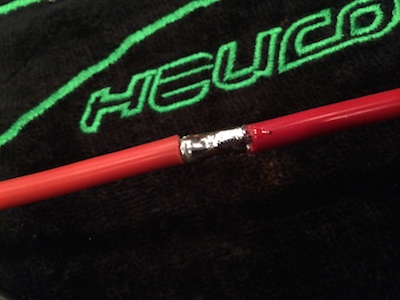
Once the connection cools, add a layer of insulating heat shrink, followed by a second layer for extra protection.
Now, insulate the end of your extended positive lead with electrical tape or heat shrink. Follow the same steps to extend the negative power lead. The only thing I do differently on the negative side is that I cut the battery’s negative lead about an inch shorter than the positive lead, causing the two splice points to “stagger”. This will help prevent any possibility of the two splices ever shorting out due to vibration and wear-through:

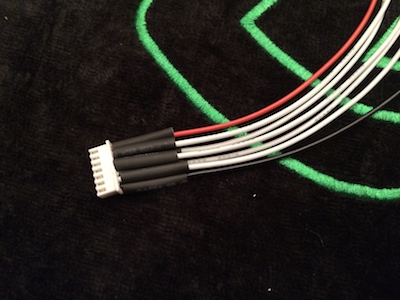
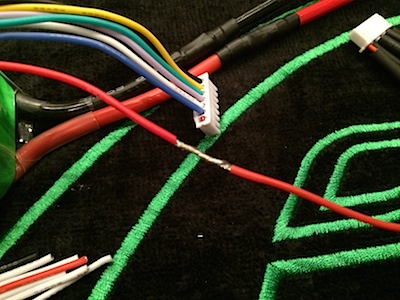
The next step is to extend the balance leads of the same (rear) battery pack. You will need a balance lead extension cable, such as those manufactured by ProgressiveRC. The first thing I do, is to place both battery packs end-to-end and lay the balance extension out with the connector lined up with the front pack’s balance connector. This way I can accurately judge where to cut the extension, so that the finished stick pack’s balance connectors will be of equal length.

When cutting the balance extension, be sure to cut about ¾” or so behind the original balance connector as shown below. This will allow you to strip off about ¾” of insulation off both wires, twist them together, and still end up with the correct final length. Now, cut some pieces of small diameter heat shrink. These need to be long enough to cover your soldered connections. I made mine just a bit over 1” long. I recommend placing all the pieces of heat shrink over the individual extension leads now, as I always forget if I do them one at a time. And I hate when I finish soldering a piece of wire, only to discover I forgot to put the heat shrink on first!!
Cut the first balance lead from the original connector, and strip away about ¾” of insulation. Also, strip off the same amount from the matching extension lead. Be careful to match the correct wires! When twisting the leads together, I first cross them at 90 degrees and begin twisting both ends simultaneously. This gives me a very tight twist which does not unravel while I am soldering.
Repeat this process, for ONE wire at a time until all balance leads have been soldered and covered with heat shrink.
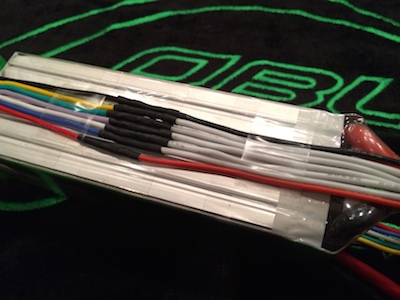
Lay both batteries end-to-end as they will be oriented in the finished stick pack, and stretch out the main leads and balance connector leads. Now take a piece of transparent tape, about 4 or 5 inches long and attach it to the rear pack. Then stretch it a bit and attach it to the front pack. If you stretch the tape tightly enough, it will pull the two packs together once attached to the second pack:
Then, flip the pack over and repeat this process on the bottom. This tape will hold the packs together temporarily, until the final outer heat shrink is added. Next, flatten out the balance leads as much as possible and secure with a couple more pieces of transparent tape. This will help keep the wires as tight to the battery pack as possible, and prevent them from shifting around during the final heat shrink process. This way the battery pack will be as slim as possible for a better fit into the model.
Flip the battery over and repeat this process for the main power leads. Lay a piece of large clear heat shrink over the batteries, and trim so it extends about ½” to ¾” past each end of the pack.
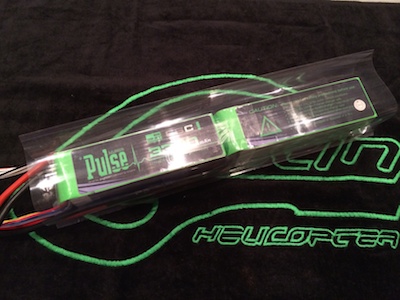
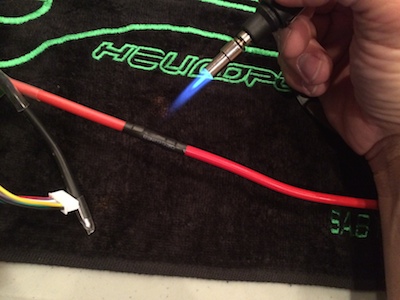
Finally, slide the trimmed heat shrink over the assembled pack and carefully heat it with a heat gun to complete the stick pack. Note: To achieve even shrinking of the material with as few wrinkles as possible, heat gently on each side, and then rotate to the next side. Keep repeating this process, shrinking each side a little more until the whole pack is drum tight. Once the heat shrink is tight, the finished pack may have a slight bend to it between the two batteries. If so, simply bend the batteries so that they form a straight line, and carefully heat the side that wrinkles up. This will tighten that side, and hold the pack permanently straight. You may need to do this a couple times to achieve a perfectly aligned 12S pack.
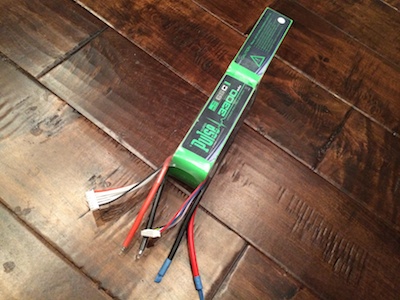
Happy flying!!!
Cris Trebbi (aka SynergyAero)
Team SAB Goblin USA