HeliCommand X-Series Flybarless Controllers
Written by Justin Pucci
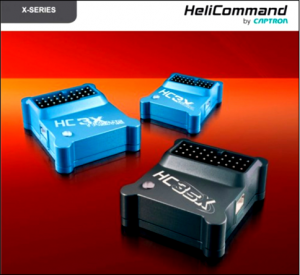
Thanks to Danny Melnik at DemonHeli and Joachim Eulefeld at Captron, I was able to get my hands on the somewhat mysterious Captron HeliCommand HC3-Xtreme and HC3-SX flybarless controllers to test out and review for the Nation. I only say “mysterious” because with the multitude of flybarless systems out there, you usually don’t hear that much about the HeliCommand series of products. I can tell you though, that after putting these things through their paces, I’d be willing to say that this may be one of the heli industry’s best-kept secrets! Read on to find out why…
Product Description
The first thing that caught my eye with the HeliCommand was the fact that it comes in a sexy little tin with a window that gives you a sneak-peak of what’s inside. This is quite a nice touch, as a lot of companies out there really don’t understand the value of a good, high-quality packaging job. This is the first thing you see when you pull this thing out of the package and, let me tell you, it made a great first impression on me.
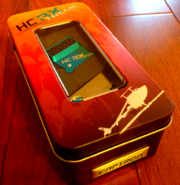
Once you break open the tin, you’ll find that the flybarless controller is tightly contained inside a dense piece of foam alongside the USB programming cable, a servo adapter harness, mounting foam for electric and nitro/gas models, and a HeliCommand USB stick. Yep! They give you an actual 1GB USB stick with the manual and PC software on it! Really cool touch, Captron. When you pull all of the bits and pieces out of the tin, you’ll find that there’s also a decal sheet stuck in there, which is a HUGE plus for me, because I’m kind of a sticker whore…

The flybarless controller itself is a beautiful piece of work that is cut from two pieces of anodized aluminum. What you’ll notice depending on what unit you choose to purchase, is that the HC3-Xtreme is blue-anodized and the HC3-SX is grey-anodized. Both of them are have upward-facing servo ports, two Spektrum satellite ports (one on each side, another nice touch), and a single large LED for indicating programming and operational modes as well as error codes. One subtle, but awesome little feature is that the four screws that hold the base and top cases of the controller clamped together are potted with a clear, RTV-like material that prevents them from backing out during even the most extreme vibrations. It’s the little things, guys…
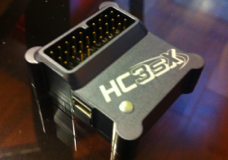
The USB programming cable is a simple USB connector on one side and a servo connector on the other side. I personally really like this, as it eliminates the need to get creative with how to fit one of the small USB connectors into the unit in airframes with particularly tight fits.
Just a quick note on features…The only difference between the HC3-Xtreme and the HC3-SX is that the Xtreme is only capable of flybarless control whereas the HC3-SX adds HeliCommand’s self-leveling and bail-out modes via a rather ingenious and proprietary employment of their 3-axis gyro system.
Yep! For those of you who have a technical bent, you heard me right…no accelerometers! You know what that means? Not only are you dealing with a company who knows their stuff, but there’s no reason to worry about your bailout not working because your heli is vibrating too much…that would suck, wouldn’t it?
Installation and Programming
Alright, so onto one of the most important and also most underrated parts of any flybarless system: Installation and programming…why, you ask? Well, if it takes an engineering degree in structural dynamics in order to determine the optimal mounting material to prevent transmission of vibrations and proficiency in control theory or a foreign language to get through the programming, then who cares whether it flies amazingly, right? Sorry, but capability isn’t worth anything if it’s next to impossible for the average use to unlock it…
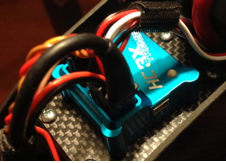
Before we jump into the programming, I’ll touch briefly on the installation of the unit on the heli because HeliCommand made it so easy it doesn’t take much of a description. First off, the unit comes with thin mounting tape for electrics and thick mounting tape for nitros or gassers. The tape fits the unit perfectly, so there’s no real fussing there. Furthermore, my limited experimentation with different types of tape suggests to me that this system is so well isolated from vibrations that it doesn’t really make a huge difference how you mount it…how refreshing! Note that I did not get an opportunity to test it out on a nitro or gasser heli, but I’ve heard similar feedback from other users with regard to its robustness to vibrations.
As for what orientations you’re allowed to mount it in, you choose…servo sockets to the front, rear, left, right…upright or inverted…you can even mount it on a left or right vertical frame side. Awesome!
Ok, now let’s do some programming. First off, the manual, unlike most flybarless manuals out there is fairly helpful and, while it does have a few German-to-English translation funnies, it’s much more readable than most I’ve seen. That having been said, who cares when the PC software is so easy to use and the wizard is fool-proof?!

The software is easily loaded on your Windows PC (sorry, no Mac support at this time) and greets you with the main screen labeled “All.” On this screen, you’ll notice a few cool things. The logo displayed at the top is adjusted depending on what version of the HC3 you’re programming…just select your unit in the “Device” drop-down menu and you’re ready to go.
Another thing you’ll quickly get used to is the right sidebar on each of the screens. Labeled “All Settings,” this is where you can load or save a configuration file, restore factory defaults, copy or undo settings, and finally read and write settings changes from and to the unit. It will also tell you the status of the USB cable connection and the connection to the unit itself. Remember that in order to save a setting change, you must click the “Write” button at the bottom of the “All Settings” sidebar.
When you first set up the system, you’ll be guided through a compulsory wizard that walks you through each of the seven (eight if you have the SX) programming tabs. Each tab gives you clear instructions as to what needs to be done to progress through the setup.
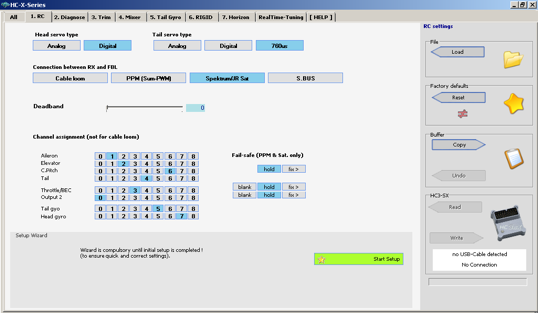
1. RC
The “RC” tab allows you to choose head and tail servo types with support for analog, digital, and short pulse-width (760us) servos. You also choose your receiver type here. You have the option of running the included cable loom from the controller to a standard receiver like the Spektrum AR7100 or JR R921, a PPM receiver, Spektrum/JR satellites, or Futaba S. Bus.
On the transmitter side of things, you can add deadband into the system to deal with transmitter pot issues and choose your channel assignments for all of the receiver types except for the cable loom configuration. While the default failsafes for cyclic and rudder are always neutral, you can select failsafe conditions for collective, throttle, and output-2 (an auxiliary channel) in PPM and Satellite modes. The three options are “blank,” which allows the channel’s failsafe from the radio to take over, “hold,” which maintains the last position of the channel, and “fix,” which forces the channel to a pre-defined position.
2. Diagnose
This tab is where you’ll make sure that your radio limits, zero-points (sub-trims), and directions for each channel are set correctly. It also gives you the ability to see what the head and tail gyro gain values, real-time tuning values, and stabilization gain (SX only) values are when you have these assigned to switches or pots on your radio for in-flight tuning or mode-switching. Remember that the percentage displayed in your radio for the tail gain for example is not the actual tail gain value that the HeliCommand uses…only use the numbers in this screen when changing these parameters in other tabs.
3.Trim
The “Trim” tab sets all of your servos to the neutral position and gives you the opportunity to install you servo arms as close to 90-degrees as possible before electronically adjusting the individual servos to get a level swash.
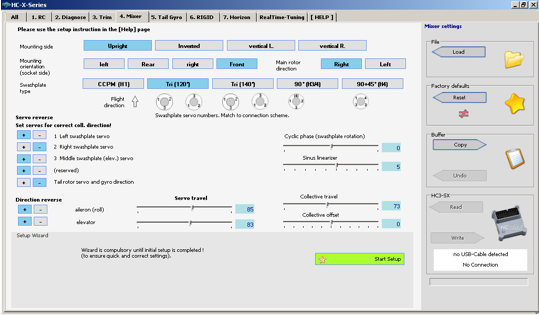
4. Mixer
In this tab, you choose which side the unit is mounted on (upright, inverted, vertical-left, or vertical-right), the orientation of the servo sockets (left, right, front, or rear), and the main rotor direction (right = clockwise, left = counter-clockwise).
You also get to select the swashplate type here. The X-series of flybarless controllers support H1 CCPM, H3 120-degree and 140-degree, H4 90+45-degree, and H3 and H4 90-degree swashplate layouts.
Next, you’ll set your servo directions to make sure that you’ve got the correct collective and tail directions. Then, you move onto setting your aileron and elevator servo travel to ensure maximum control throws without binding. Keep in mind that these values should between 50 and 100 if you’re mechanics are set up correctly. Less than 50 means that your servo ball-to-center distance is too long (too much mechanical gain), while more than 100 means that you need to increase your ball-to-center distance. Finally, the collective travel is set on this tab. This is where you’ll set your desired collective pitch range.
There are a couple of additional features here that give the user a bit more flexibility in setting up complicated or scale models. These include electronic swashplate phasing, collective offset (hover pitch), and a sinus linearizer, which basically adjusts the servo movement to negate the non-linear travel due to the arc-shaped path along which a servo arm moves. I didn’t mess with any of these on my heli, as I was setting it up as a 3D/acro model, but this may come in handy for others that are interested in scale or very mild sport (non-inverted) flying.
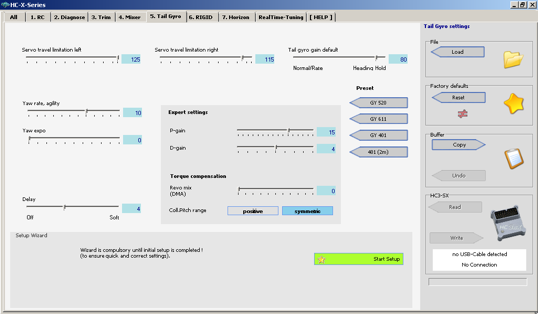
5. Tail Gyro
Ok, on to setting up your tail! Left and right servo travel limits, tail gyro gain, and yaw rate are the three main parameters on this menu to which you need to pay attention. Captron has selected a standard tail gyro gain structure whereby the gyro is in heading hold mode between zero and +100 gain and in rate mode between zero and -100 gain. The yaw rate is your tail agility value…I ended up setting mine to 10, where the default is 12. This is all personal preference, so tune to your liking. You can also choose to set yaw expo here or keep it in your radio. Finally, the delay parameter allows you to set your tail stop gain behavior.
In addition to what I’ll call the basic parameters described above, there are more advanced parameters such as P-gain, D-gain, and collective precomp (revo mixing). I would not suggest that you mess with these unless you understand what they do. Captron gives a really good description of each one and how to tune it, so if you’re inclined to play around with them, read through each of the descriptions first.
The final and pretty neat tail feature provided is the “Preset” function. For those of you who aren’t quite sure how to set up your tails, you can choose between four different gyro “feels”: “GY520,” “GY611,” “GY401,” and a large-scale version of the GY401 called “401(2m). Pretty cool stuff, guys! I’ve personally tried the “GY520” and “GY401” settings (the gyros that I’ve flown before) and can say that they accurately capture the feel of these Futaba classics.
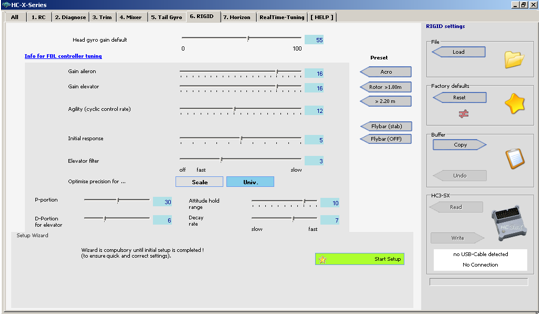
6. RIGID
Alright, we’re almost done…I promise! This tab is where you do all-things cyclic control. Let’s just jump straight to the “Preset” function for the head, since it really helps in terms of default values. You can choose from three flybarless settings (“Acro,” “Rotor>1.80m,” and “>2.20m”) and two flybarred settings (“Flybar (stab)” and “Flybar (OFF)”). Again, Captron has really hit the nail on the head here with default settings, so don’t get overwhelmed with all of the advanced tuning parameters. I found that the “Acro” flybarless mode worked great as a safe and well-behaved starting point. The only real basic parameter to tune here is the head gyro gain, but there is a whole host of advanced parameters that will allow you to fine-tune separate aileron and elevator gains, cyclic agility, stick response, elevator bouncing behavior, P- and D-gains, cyclic disturbance rejection (attitude holding during neutral cyclic inputs), and elevator decay rate.
For the purposes of this review, I’ll leave you to reading each of the detailed tool tips for each of these parameters, as I could probably write an entire review just on Captron’s advanced parameters and how to tune them…What I will say is that I spent a lot of time playing around with the advanced tuning parameters and found that they all do what they’re supposed to and, when tuned correctly, will improve the feel of the heli; however, the default settings really are great. Trust me…

7. Horizon
This is an SX-only tab, as it controls the self-leveling and bailout modes. Here, you’re able to choose between “Rigid,” which is just the standard flybarless control loop or “Horizon,” which is the stabilization mode. Once you’ve chosen “Horizon” mode, you then get to pick between two “Self-Leveling” modes (“Hover & Scale” or “Norm. & Inv.”) or two “3D” modes (“Acro” or “Goes to Pos.”).
The self-leveling modes cause your heli to right itself back to a stable hover orientation in either upright only (“Hover & Scale”) or upright/inverted (“Norm. & Inv.”) orientations. The 3D modes act to bailout your heli from a botched maneuver or tricky orientation by taking control of your cyclic and collective controls to self-right the heli and also (depending on the “Horizon” gain value) perform a collective punch-out to bring the heli to a safe altitude. A “Horizon” gain value of +10 to +100 will give you a steadily-increasing bailout to the safest orientation in “Acro” mode or to upright in “Goes to Pos.” mode, while a “Horizon” gain value of -10 to -100 will add a collective punch-out to the self-righting action.
Captron really thought of everything and this tab is no exception… Just like the rest of the tabs, there’s an advanced parameter menu here too. These parameters will allow you to fine-tune your self-leveling or bailout experience by adjusting the self-leveling stop gains, collective pitch travel in the 3D modes, a manual override for stick inputs (a sort of self-leveling deadband of sorts), and stick response (how sensitive the sticks feel).
8. RealTime Tuning
The final tab…woohoo! This one is just the icing on the cake for me. Quite simply, this function allows you to reassign your tail gyro gain control channel to any of the parameters in the “Tail Gyro” or “Rigid” tabs so that you can tune it from the radio in-flight. This is absolutely awesome for getting the tail and cyclic agilities set to your liking and also to tune some of the more advanced parameters like the individual head or tail gain components. Thank you, Captron!
Summary of Programming
So honestly, the wizard on the HeliCommand works so well that I could have simply written “follow the wizard’s instructions” at the beginning of this section and then moved on, but I feel that it’s important for you to understand how powerful this system is in terms of both basic default settings as well as advancing tuning capabilities. For those of you who would like a more detailed description of the advanced parameters or help with programming or tuning your HeliCommand system, please feel free to contact me. In the meantime, let’s move on to flight performance…
Flight Performance
So, this is where things typically get subjective. Everyone has their own preferences for how their heli “feels” and when it comes down to it, there’s no wrong answer as long as you’re happy with what you’re flying. I’ll try to be objective when necessary, but you’re also going to get some of my personal thoughts. Also, for the purposes of comparison, I’ll focus on the two most popular flybarless systems: BeastX and V-Bar.
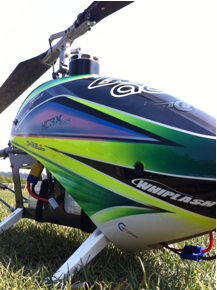
My test rig was a Miniature Aircraft Whiplash Electric with a Castle ICE2 120HV, KDE 700XF-495, Hyperion DS20x-SMD cyclic servos, Futaba BLS251 tail servo, Mavrikk G5 710 VST main blades, and KBDD Extreme 112mm tail blades at 1900, 2000, and 2100RPM.
A couple of facts about me that I think are relevant to this portion of the review…
First, I’m no Kammerer or Szabo in terms of flying skill, but I can hold my own and tend to refer to my style as smooth 3D mixed with big air. Honestly, I probably represent a good portion of the heli community in terms of flight skill, which I think gives me an advantage in terms of testing these types of products.
Second, I’ve done a lot of testing and tuning of flybarless systems and, as an aerospace engineer who works professionally in space propulsion and power systems, I’m well-versed in control theory and tuning. I can assure you that this is both a blessing and a curse. The blessing part is obvious, but let me elaborate on the curse bit…
If you’re an experienced flybarless tuner like me, don’t get bogged down in advanced parameters until you need to! I got stuck in this rut initially because I thought I knew what I wanted early on and found myself with a heli that didn’t feel all that great to me. When I took a step back and put my faith in the default values, things came back together. Of course, this message also goes for you new guys who have no clue what you’re doing…the take away? HeliCommand has given us a very good starting point with its defaults on both the head and tail. Ok, yeah…I know I already said this, but it’s that important!

Tail Performance
This is the one I’m always the most concerned about when tuning a new heli and that’s because nothing saps your confidence more than a crappy tail. Lucky for us, the HeliCommand passes this test with flying colors…no pun intended. I can say with absolute confidence that the X-Series easily meets or exceeds the performance of the V-Bar tail without the hassle of Mikado’s advanced tuning parameters, which are just a nightmare… Furthermore, it absolutely blows the BeastX out of the water!
Why? The X-Series tail feels very smooth and precise, but without the pirouetting inconsistency of the BeastX and the 50-flight tail tuning routine of the V-Bar. The control actually feels linear with zero expo in the controller (as it should be) and can be softened around center very nicely with radio expo. I was able to tune the stop gain to give me nice crisp stops without any mushiness or bounce-back and I didn’t find a need for revo mixing. My gyro gain ended up optimizing at 80-85, at which point the tail held against even the fastest, hardest funnels and hurricanes. I personally prefer a happy medium between the “GY520” and “GY611” presets with a P-gain of 15, yaw rate of 10, and delay of 4. All told, it took me three flights to get my tail feeling the way I like it…not bad at all!

Cyclic Performance
The cyclic tuning is what originally gave me some trouble, but only because I jumped directly into the advanced parameters as I warned against above. After restarting with default values and running through three or four tuning flights, I wound up with an optimized gain value around 55-60, an agility of 8, an initial response of 4, an elevator filter of 3, and a P-gain of 30. This gave the heli a very connected, but organic feel. What do I mean by organic? Not robotic, not mechanical…instead, the cyclic control felt very responsive around center, but buttery smooth everywhere else. For me, that’s the ticket…a good, clean flybarless control loop that only does what you tell it to do, but yet maintains some of that natural flow through pirouetting maneuvers like an old-school flybar. For those of you who prefer a more mechanical feeling heli, don’t worry. The HC has definitely got it all… I didn’t find a need to adjust the individual aileron or elevator gains, but if you find that the head gyro gain isn’t sufficient to get the feel you want in both axes, then give them a try.

HC3-SX Self-Leveling and Bailout
Honestly, this feature is what ups the ante when it comes to other flybarless systems. Just think…a flybarless system that can grow with you from first hover to first piro-flip and beyond. Thats what the HC3-SX represents. The self-leveling modes are perfect for people who are new to helis and haven’t quite developed the muscle memory necessary to confidently control the heli in all orientations. Set it up for upright first and get used to the heli in each of the four orientations, then set it up for inverted and master those four orientations too. You can tune the “Horizon” gain or stabilization gain from low to high depending on how strongly you’d like the heli to self-right itself so that, as you build your skills, you can progressively reduce the amount of “help” that you get from the SX.
When you’re ready to move on to 3D, set the SX to “Acro” mode and put your new-found god-mode on a momentary switch. This is the mode that I spent most of my time with… I personally find the collective punch-out feature combined with “Acro” mode to be the most useful for trying new 3D maneuvers. While you can vary the “Horizon” gain in the negative portion of the range to fine-tune the amount of collective control you want to give to the SX, Captron recommends running it at -100 because while the bailout switch is active, this ensures that no erroneous collective inputs by the pilot will endanger the heli’s ability to recover.
Just in case you’re wondering, cyclic can always be taken over by the pilot during the bailout and the tail remains completely in your control. Just remember to center your collective stick during the bailout so that when you release the switch, you heli doesn’t jump back in the wrong direction (towards the ground) because you had the wrong collective input prior to the bailout.
I didn’t find the need to go into any of the advanced parameters with the self-leveling and bailout modes, which further attests to the quality of the default settings in these flybarless controllers. If you’d like to see these features in action, take a look at my SX self-leveling and bailout video below.
Conclusion
To wrap things up, I really enjoyed my experience with the HeliCommand HC3-Xtreme and 3SX flybarless controllers and must say that they’re a force to be reckoned with in the flybarless community. The tail is rock-solid and feel crisp and clean, the cyclic is infinitely tunable, but yet simple enough to optimize in just a few flights, and the SX’s self-leveling and bailout features give you a true god-mode that will allow your skills to soar! I can say, without reservation, that I’ll be selling my BeastX units…sorry, guys. I realized what I’ve been missing and I’m not going back…
Of course, as with any product, there have to be some negatives, right? Really the only downside to this system for me personally is the lack of a governor. Given that most all of the competitors’ flybarless systems offer a governor as a standard feature nowadays, it’s may be difficult to stomach the price of the HeliCommand units without one… Hopefully Captron is listening and will surprise us in the future, but in the meantime, I personally think that I can deal without a governor because of the other awesome features. Can you?
Speaking of price, the price of these systems are steep, which makes it tough to commit to when you need to equip an entire fleet. Luckily, Captron just released news that as of November 2012, the HC3-Xtreme will be reduced to $249 and the HC3-SX will be reduced to $499! This is really great and brings this awesome system closer to the comfort level of most heli pilots.

Now, you’re saying to yourself “but the SX is still five-hundred bucks!” Yeah, but just think… If you bought one SX and equipped the rest of your fleet with Xtremes, then you’d have a dedicated learning heli and a great-flying fleet all around. And what does that extra $250 above the typical flybarless unit get you? If the bailout mode saves you just one average crash on a 90-sized machine, it’s paid for itself. In reality, it’ll save you so many crashes, you’ll soon be able to afford to equip all the rest of you helis with one.
Give HeliCommand a try, guys…I think you’ll be pleased. Also, feel free to contact me at or “Justin Pucci” on all the forums if you have any questions or need help with your HeliCommand.
Again, I’d like to thank Danny Melnik at DemonHeli and Joachim Eulefeld at Captron for giving us here at the Nation the opportunity to test the HC3-Xtreme and HC3-SX and as always, thank you to the listeners for your continued support and interest in our product reviews.
– Justin
