
Installation
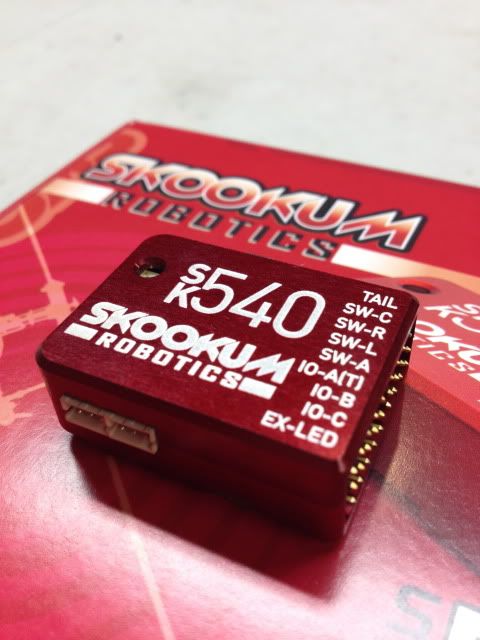
The packaging was simple and yet effective. Nothing fancy or flashy, but everything you need to get the job done. Included is the unit itself, a USB cable, a short installation manual and a gyro pad. From previous FBL experiences I went with a gut feeling and ditched the included gyro pad (it was quite soft) and went with a single layer of 3M gray on the electric and two layers of 3M gray on the nitro. The included gyro pads in most of the FBL systems are generally too soft and a lot better performance can be had in a good mechanically sound machine by going with a firmer tape. Results later confirmed this was a good hunch.

Programming
Once I got everything installed, I used the link provided in the installation manual and downloaded the software onto my computer. Installation went smooth and I didn’t have any USB driver issues or anything like that. Upon first startup it automatically started with the first “Wizard.” These wizards are put into groups such as initial configuration, swash/cyclic, tail, and governor. I can not begin to tell you how priceless these Wizards are. They will literally walk you through step by step every single little setup that needs to be made. It’s neat because they even go to the effort of drawing little red circles around the data boxes you’ll be changing to show you exactly where to input your settings. Once you complete a single step you simply click the Next button and it will move along to the next step. Some of the steps are there simply just to help you double confirm you performed the previous step (like sensor directions for instance).
The process of going through the Wizards really instilled a lot of confidence in me. I can remember my first FBL experience and I was terrified of that first hover having heard all the horror stories of tip-overs and the heli doing “crazy” things. You simply don’t get this with unit because they make the Wizards so simple, clear, and intuitive that you don’t feel like there’s any room for error when you’re done. Here’s a screen shot of one of the initial steps as it walks you through your radio setup:

Once you’ve gone through all the wizards you really are 100% ready to fly the heli. Now here’s another one of the great features I like about this unit. Once completing the Wizard’s at that point your still in what’s called the Basic software. The basic software is exactly as it sounds. It gives you the more simple tuning functions like tail gain, yaw rate, expo, etc. This keeps things simple and less daunting when it comes to tuning. Let’s be honest, most of the pilots out there will never need to leave this mode of the software. There’s just enough tuning options in here to get a heli flying VERY well but not so many as to clutter and confuse the average person. This approach is very important when it comes to someone who might not only be new to FBL but maybe just new to flying in general.
For those of you who do love to tweak and want to get every last little bit of perfection out of the way it flies you simply go up to a drop down menu on the top and choose Advanced. It’s that simple. Biggest thing to me is that it’s FREE. In my opinion charging for advanced level tuning software is a joke. You already bought the unit once so why should you have to pay more to have it fly at a top level? Once you’ve chosen the advanced software it unleashes all of the parameters needed to tweak every last little characteristic into and out of the way it flies. Some of the naming on these parameters is not what I’ve been used to but what Skookum did to help with this is provide little pop out information dialog boxes that appear when you hover your mouse over a parameter.
This really helps with understanding what does what. I should also mention that earlier on in the setup one of the steps is to choose a group of starting settings for all the parameters based on what you think your flying style is. For myself I chose Basic 3D but there’s also Scale and Sport. This just helps all the default values to be closer to what your end goal is and help that first flight be a positive experience. Those of you who have had previous advanced FBL tuning will quickly recognize the parameters in relation to their corresponding PID functions. I decided to leave everything at where the unit’s default settings put it and tune from there.
Another really neat feature of the software is sort of a hybrid combination of Bank switching and remote gain tuning. Within the software you have two “banks” for the cyclic and two for the tail. All the values within each one can be changed to whatever you’d like. Then you assign each one of these banks to a switch on your transmitter. So for instance you might have Bank#1 and Bank#2 of your cyclic be on the Gear switch on your TX and you might have B#1 and B#2 of the tail on your Aux2 switch. This can make tuning not only go a lot faster but can also give you the ability to feel changes instantly in flight. The other option is you can set it up to where your tail gain is controlled by one channel and your cyclic gain is controlled by the other.
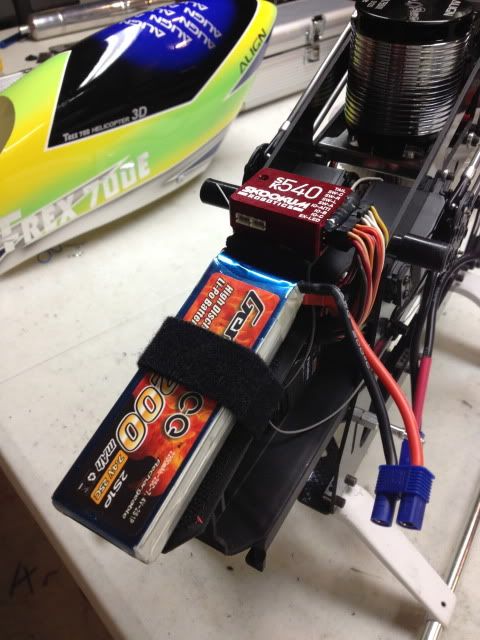
Since I’m using the 8FG I opted for this option and assigned my tail gain to one knob on the front face of the radio and my cyclic gain to the other knob. This made head and tail tuning VERY easy and quick. I should bring up that because of the way the nitro governor works on the SK540 it does not use an AUX channel to control headspeed like a traditional nitro governor does. It’s setup more in the same fashion as the CC set RPM mode where you input your desired headspeed values into the software and program predetermined throttle curves into the radio. The awesome part about this is that you can still control two independent banks on a 7ch radio and still retain governor function. So for those of you DX7 users you’ll get to play with the cool features too. At this point I went ahead and secured all my wiring and put the last polishing touches on the install.
Flight Performance
So… How’s it fly?
The maiden flight was exactly how every FBL maiden flight should be…Uneventful! The heli flew very well and while I could obviously pick out some little quirks overall it was flyable in all aspects and had no negative tendencies that at any point got me worried. By the second flight I had the tail locked in very well and actually left it at that point to come back to in a little bit later. By the fourth flight I was very happy with the way the heli was flying in general and for most sport pilots and light 3D guys it was acceptable in every single way possible. I had exhausted all the parameters in the Basic software and it flew great!
At that point it was time for the geek in me to take over and out came the Advanced software. This is where you can really make the heli shine for YOU. I set the Auto Tune on the bell gains to ON and put three more flights on it doing my best to give it a whoopin’. With every flight it got better and better as those Bell Gains automatically dialed in. After the third flight I turned them off and only ended up dropping them each 5 points to deter a very slight bobble I saw on really hard cyclic popping maneuvers. I brought the Hiller Decay up 20 points to help “loosen” the cyclic a bit and give it a little more of that flybar flow to it in piroflips and piro maneuvers. I bumped the cyclic acceleration up to 30 to give me that snappy reaction off center and settled at about 20%. Cyclic is DONE!
Now to be honest I did go through and ramp most of the parameters up and down just to feel what it was like but in the end that was strictly more to satisfy the geek in me and not to make it fly any better. Both the nitro and the electric got the same treatment and to no surprise ended up with pretty similar numbers. I’m really happy with how the cyclic feels. Very connected and most important is I feel that I can make it fly with numerous different styles and still be able to tune out any little negative tendencies. Traditionally, with the more basic FBL systems to get them to perform at a top level you end up almost kind-of stuck with a single feel to it. The available advanced parameters of the SK540 allow a lot of adjustability in this area so that concern just isn’t there.
The tail… ahhh yes… that oh so glorious tail. You know that saying how you don’t realize how bad something is until it’s fixed? Well that’s EXACTLY what I went through. It was very obvious on the first flight the tail was going to be great. It’s got a very linear and consistent feel to it through ALL conditions. That’s one thing I’ve seen with other units is yeah they’ll be pretty consistent just doing basic to moderate maneuvers but when you start adding collective and piros together they start whipping and losing that linear feel. Not this one! With acceleration, stop gains, yaw rate, cyclic and collective precomp, and the all familiar PID options you can make this tail do whatever you tell it to.
Here’s the cool part though… I adjusted the piro speed, main gain, collective precomp (only on the electric), and stop gains and it’s absolutely amazing. I was expecting to dive into the inner workings of the PID values and was shocked that I simply didn’t have to. The nitro was very easy to tune and needed no collective precomp to hold fantastically. I mean seriously, it was such a joy to have such a smooth and precise feel to a tail without spending 50 flights getting it that way like I’ve had to do with other “top end” FBL systems.
The nitro governor is absolutely fantastic. I found one small glitch on spoolup. It’s not a perfect “hand-off” from the throttle curve in your radio to the governor being activated. You can notice a slight (and I do mean slight) little tail kick when the governor kicks in. That’s just me being picky though. Coming from Multigov this was noticeable but in no way really a problem. The headspeed holds very well and other than the little spoolup glitch I found nothing negative.
The electric governor was what I was really after. Having read all the horror stories of how many people had problems with the VBar governor I was really hoping that the SK540 would work as well but be far less of a hassle. I slapped a cheap HobbyWing HV120 with a HobbyWing sensor on this because I know this is a really common ESC for people to use in conjunction with an external Gov. Once again…nothing scary and very uneventful. It took four or five flights to get the governor gain all dialed in and the Low Ramp value set but that was it. Spoolup is great and it holds headspeed amazingly. Ten times better than the CC governor for those who are wondering. I did, however, find a glitch within the governor here too.
When bailing out of an auto, it does immediately spool up but it will hold a lower headspeed for about 3 seconds until it ramps all the way back up into your governed headspeed. If you have the High Ramp value too high it can give a pretty nasty kick when it re-engages. I got mine dialed down to where it’s nice and calm and it’s not that bad now. I did discuss this issue with Skookum and at this time it is indeed a glitch that needs to be fixed. Is it a big deal? No. Do I think it should be fixed? Yes. Does it keep me from doing autos and bailing out of them? Absolutely not. All in all the governor works fantastically and I’m very pleased with the outcome of it.
Conclusion
So let me go ahead and wrap this up with my overall conclusion. This unit is an absolute winner plain and simple. I’ve been asked the question a ton of times if I think it’s “better” than a VBar. I can not honestly tell you I think it flies “better” than VBar. VBar flies great and I don’t think anyone will disagree that it’s a great FBL unit. Now having said that, I can say that Skookums SK540 will easily stand toe to toe with VBar and it’s the only FBL unit I’ve flown that I can say that about. The governor is fantastic and far easier to setup. It does have a couple small glitches but they do not keep you from enjoying how well the governor is.
The tail and cyclic performance are absolutely fantastic on the 540 and I have zero issues at the end of tuning it. The software is a visually a little outdated looking but it does not affect function in any way. The LCD field terminal is $85 and offers every single thing possible that the software does other than firmware updates. Now here’s the biggest one of all. It retails for $249.95!!! There is no other unit out there that flies as good as the SK540, has both a nitro and electric governor, and full access advanced software for anywhere close to that price. For you electric guys you don’t have to buy a $550 dollar ESC to get good governor performance.
No more buying a unit for one price then having to immediately pay $40 more to simply get all the tuning capabilities it has. Is it perfect? No, but for the price I honestly don’t think anything even comes close to it. Yes there are other units in the $250 range that fly quite well but none of them support governors and can be tuned to the performance level that this can. I feel that this is a unit that a brand new person can feel comfortable installing and grow with as they progress. It used to be that you bought a cheaper FBL unit when you started that was easy to program but couldn’t fly like the high dollar ones. Then once you got better you’d upgrade to the expensive stuff to get all the features. That’s simply not the case anymore. Skookum has really introduced a top level FBL unit with (in my opinion) all the important features from advanced level tuning to step by step wizards at a price that is affordable by everyone.
So, my hat is off to the guys at Skookum. You have successfully bridged the gap with the inexpensive FBL units with limited features to the high end FBL units with the big dollar tags and all the features with the SK540. These won’t be coming off my helis any time soon!
– Nick