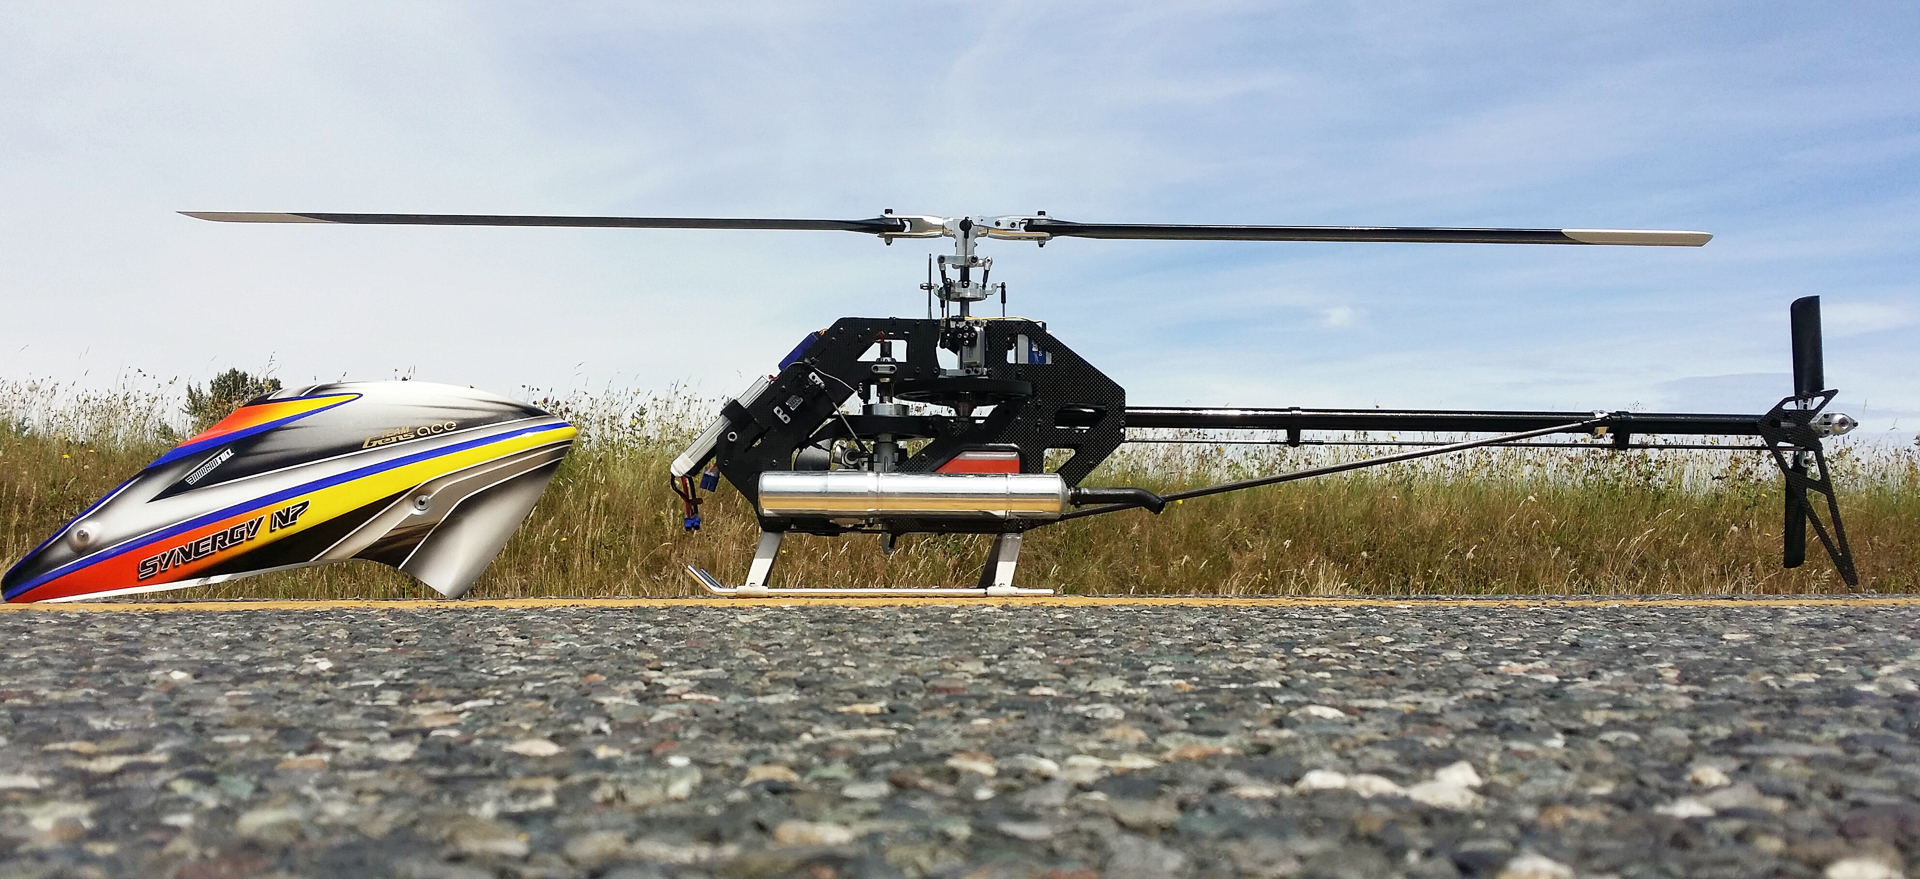
Synergy N7
Written by Jessie Salmonson
To start off, I would like to give a huge thanks to Matt Botos and Synergy RC for giving us the opportunity to review the Synergy N7. Some people have argued that the N7 is going to be the heli that’s going to put nitro back on the map. We have all seen the heli world slowly go from nitro to electric, but it is great to see nitro helis still being manufactured and released and the N7 is a prime example. So, when I found out I would have the opportunity to review this helicopter, I immediately got extremely excited!
Build
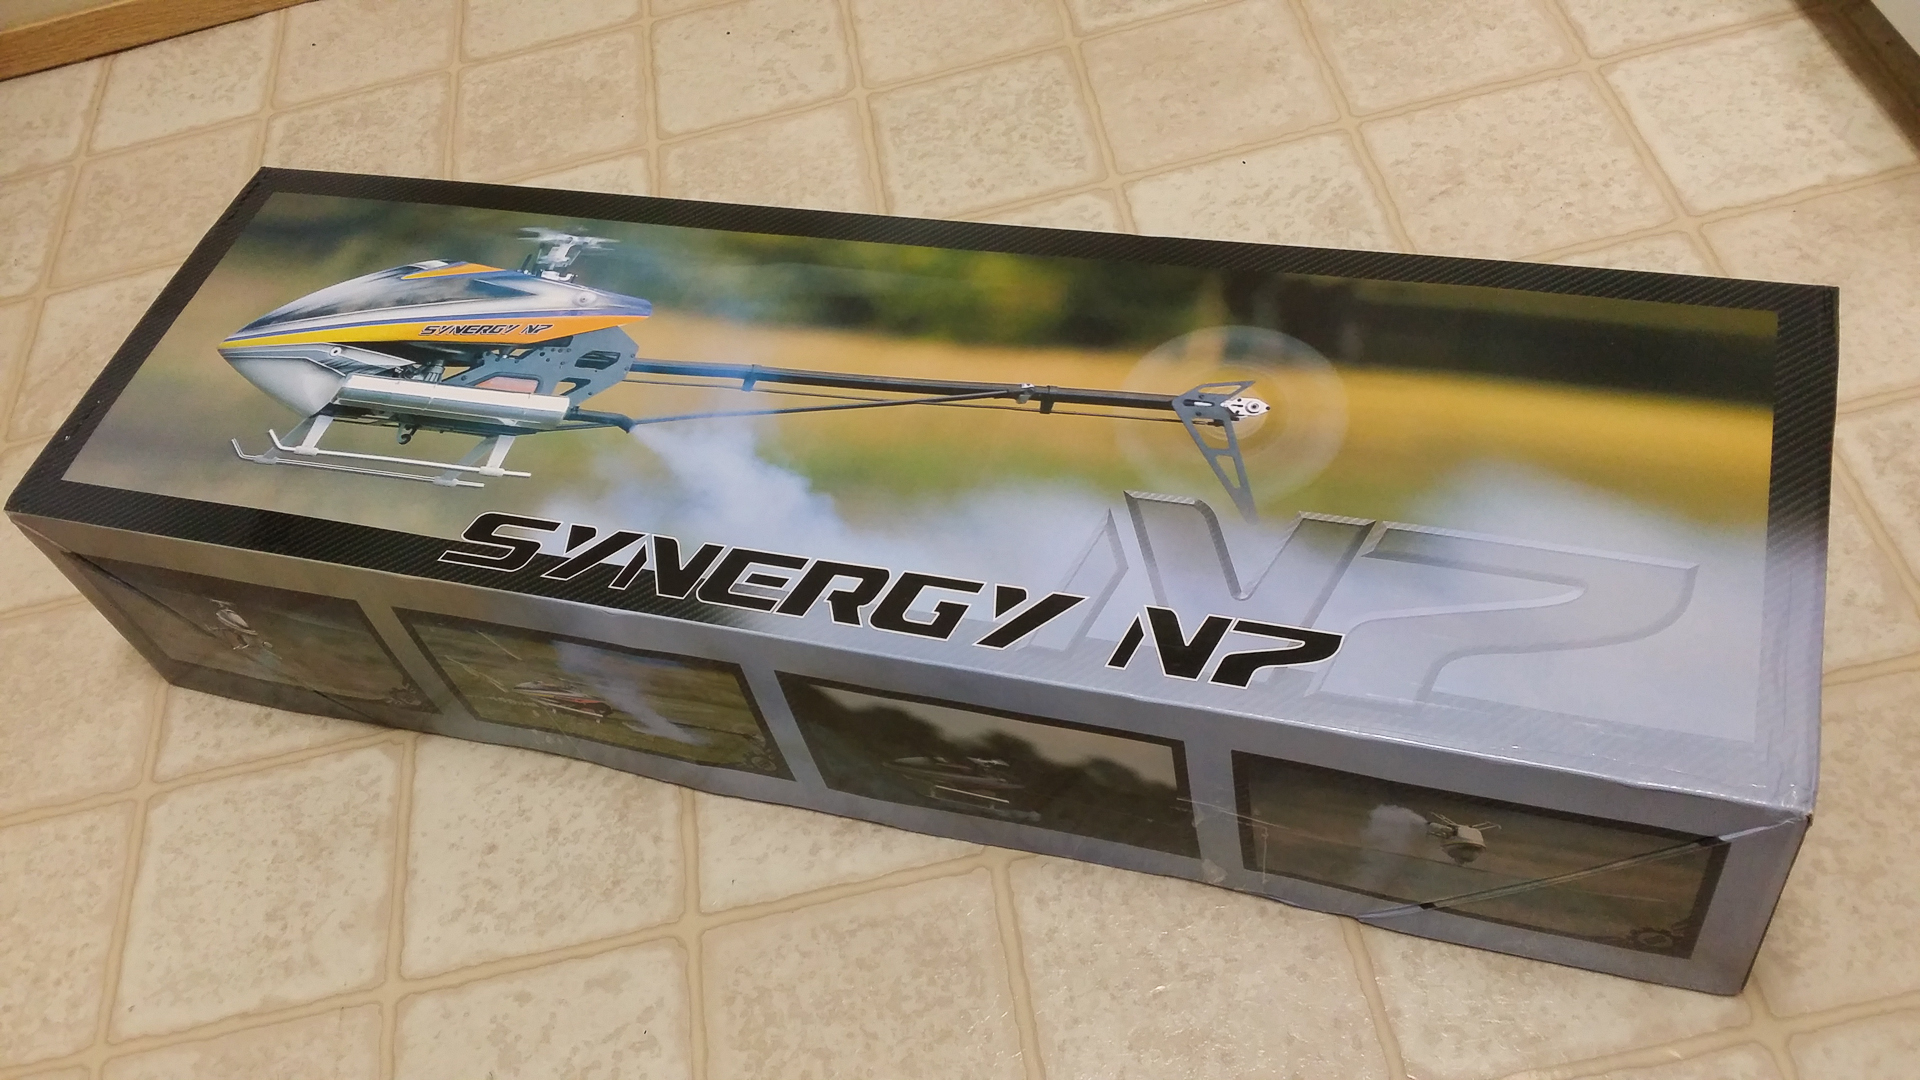
As soon as this heli arrived on my doorstep, I wasted no time and immediately started pulling parts out of the box and getting everything laid out. When you open the box, you will quickly notice that everything is individually packaged very neatly. Trust me – there is no way that any of the parts are going to get scratched or damaged. In fact, each piece of carbon fiber was in its own bag so they’re not even in contact. It seems like more and more manufacturers are going toward an electronic manual online and the Synergy N7 follows suit with this trend. For me, I’m actually beginning to prefer the electronic manual, as I can keep all the manuals for all my helis on my iPad and have access to any of them no matter where i’m at. There are so many times when i’m at the field and I’m so glad that I have access to all my heli manuals right on my phone or iPad so I can quickly find the information I need. In addition, the N7 manual is very colorful, which, in my opinion, makes the manual more pleasing to the eye and easier to follow.
I will start the build part of this review by saying that when you go through this build be ready to do some sanding here and there. I have found that with higher quality helis, the build is a lot more involved and the N7 falls in to this category. The cool part about this is that it gives you the ability to ensure that all the parts have a tight fit and have zero slop. For me, this is nothing new as I have built Synergy helicopters before so I was more than prepared!
Right when you start the build, the manual starts you off by putting together the fuel tank and inserting the clunk and the grommet. This part held me up for a bit, as I am a hardcore fuel magnet guy. For some, the clunk works great but it’s not for me. So while I was waiting for a fuel magnet I charged on with the build.
Continuing on, next up is the skids and the clutch stack assembly. The skids on this heli can be a little tricky to install since you have to slide these small threaded inserts down the skid tube then make sure they are lined up when you go to screw on the skids. This is a great design as it holds the skids together very well, but it can take some time to get it assembled. A little trick is to use an old flybar because the ends of these small little inserts are threaded. So, with a threaded rod you can easily move and hold them exactly where they need to be making the skid assembly a breeze.
As I am building this heli I start to notice some really nice touches to the manual. One thing I really like is the color-coded loctite symbols. It is very clear when and where you need to use red loctite and when you need to use blue. Another thing to note is be sure to disassemble ALL pre-assembled parts, as the screws are not tight and none of them have loctite on them. This was a change for me because some of the other helis I have built do come with pre-assembled parts that are loctited and ready to go…not the case with this heli. But this way you know that every screw is torqued down and properly secured when you finish the build. It was nice to find that the clutch liner had already been glued in so there really wasn’t much more to this step.
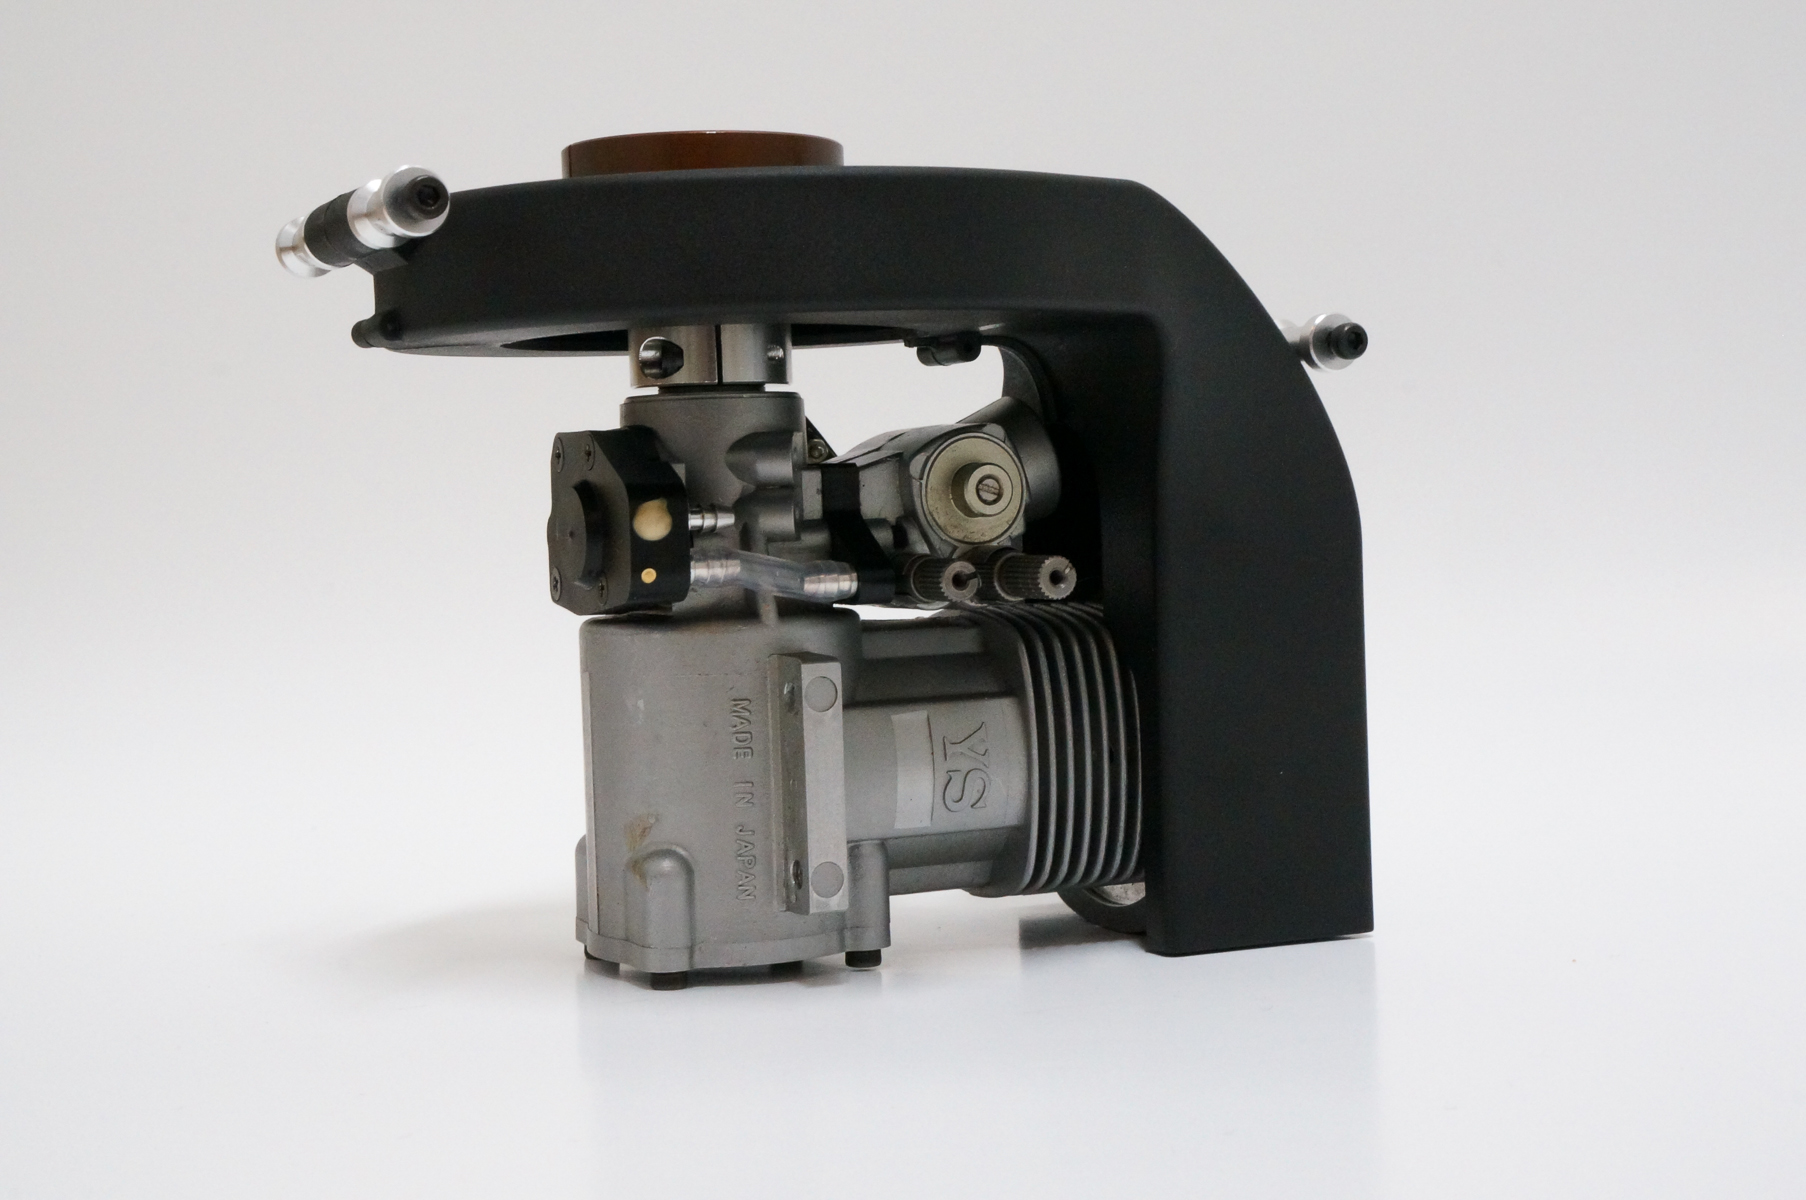
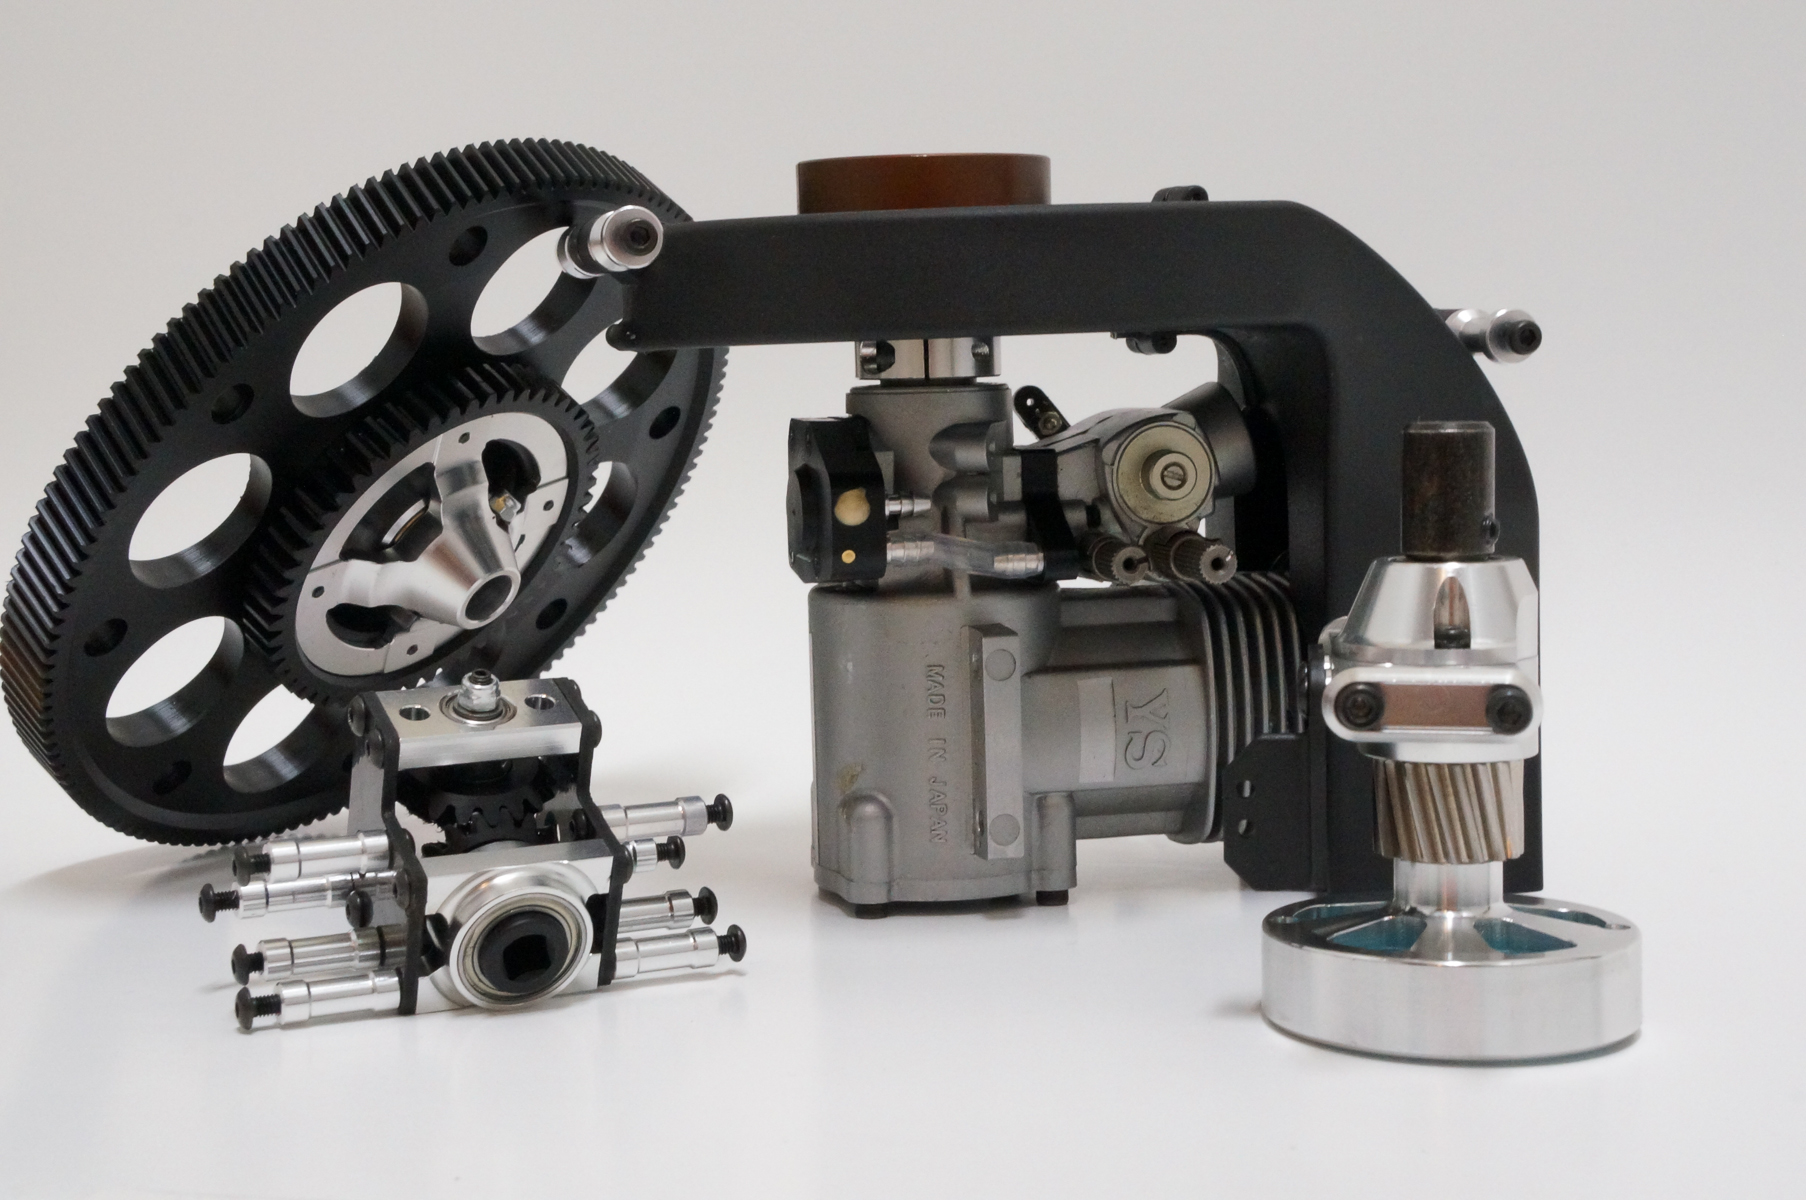
Moving on to the engine assembly, you will first see that this heli is compatible with multiple nitro engines. It will work with any nitro motor from 0.91 up through a 1.05. In addition, you can also fit the OS GT15 Gas motor in to this heli. For this review, I am going to be flying the YS 91-SR 3DS. I have heard that, in some cases, engine shims may be required to achieve proper main gear mesh depending on which motor you choose. In my case I needed a couple of thin shims to move the motor ever so slightly forward to achieve the proper gear mesh.
In most cases and from others that I have talked to it sounds like the engine requires no shimming but it’s something to be aware of and be prepared for. Now, when I got to this part of the build I didn’t have any engine shims but I wasn’t going to let that stop me. I made my own shims using an aluminum can, cutting it into strips and drilling the holes. Aluminum cans are very thin and consistent so this actually worked great. Currently when you receive your kit the correct size shims for your motor of choice will be provided. Be sure to use them if they are required for your motor or if you determine you need to shift the motor forward.
At this point, the build is cruising right along and I can’t wait to get this heli put together. Next up is the fan shroud. You will see in the manual that the fan shroud is made to fit many different motors and it WILL require some slight modification to prevent it from rubbing on the motor. So out comes the Dremel with a plastic cutting wheel installed. I did need to do some trimming on the shroud to provide the proper clearance for my YS motor. Having to Dremel my brand new heli doesn’t bother me in the slightest and I actually enjoy the required modification, but for those of you getting ready to build this heli just be sure you have the proper tools on hand to do this. When I was doing this part of the build I was just very careful to only take a little bit of material off at a time and then keep rechecking the fit. In the end, the fan shroud turned out great and fit my motor like a glove.
I continued on to build the main gear assembly, the front torque tube drive gears, and half of the frame. All of these parts are beautifully made – especially the main gear, which is a CNC Delrin helical gear. When assembling these parts, there are a couple of pointers that could help save you some time. When I first put my main gear and one way bearing assembly together it was very tight, but this can easily be fixed by sanding down one of the Delrin spacers ever so slightly. Make sure that you keep the spacer flat while you are sanding and just take off a little bit at a time so you don’t create unwanted slop. Once I had the Delrin washer sanded down, the whole assembly had very little drag and turned over very easily.
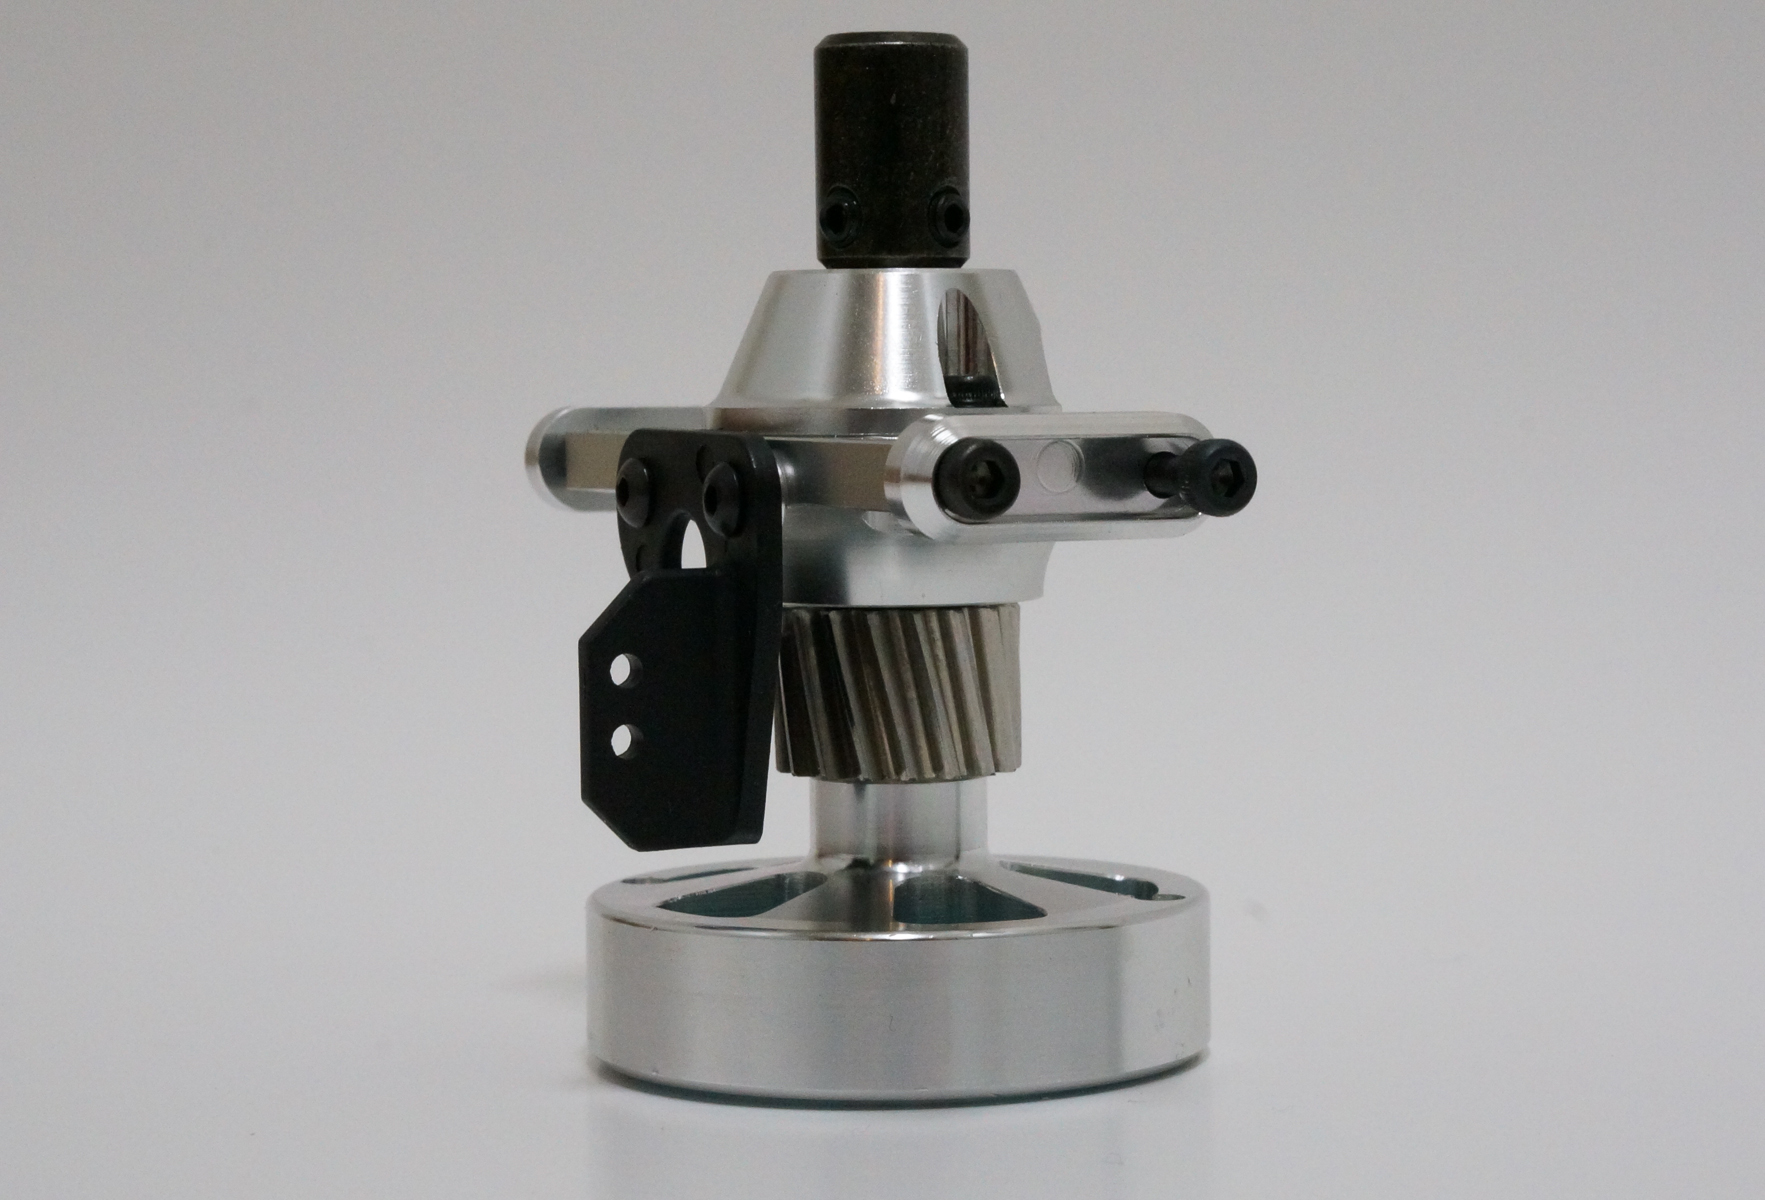
When building the front tail transmission assembly, just make sure to read and follow all of the notes! I am specifically referring to the note about making sure the m3x12 set screw is tight, as this is a crucial screw to secure the pin that holds the torque tube gear on the shaft. In general though, I found all of the little tips and pointers to be very important. So when you see that note in the margin just be sure to read and follow each one. Once again, building this class of heli may be new for some people and in certain cases it can be these little tips that can make all the difference in having a successful maiden. Once you get past this the build starts moving really fast, as you begin to put in bearing blocks in and assembling the frames.
It’s finally time to install the clutch assembly, motor, fuel tank, and front tail transmission assembly into the frame. By this time, I had received my fuel magnet and finished up installing the vent and fuel line inside the tank. I must say it can be a little tricky to install the vent, but with some patience I was able to get it all threaded together and get the fuel tank ready for installation. One thing I really like about the fuel tank is that it is almost centered right below the main shaft. This means that through out the flight the center of gravity of the model is not going to change very much. This is actually a very cool feature because one complaint I have with most other nitros on the market is that they tend to be tail heavy for the first half of the flight and nose heavy for the second half. With this model that isn’t going to be an issue! For now, I just left the screws that hold in the motor, and clutch assembly loose since once the main gear is installed I will adjust them to make sure the main gear mesh is set correctly.
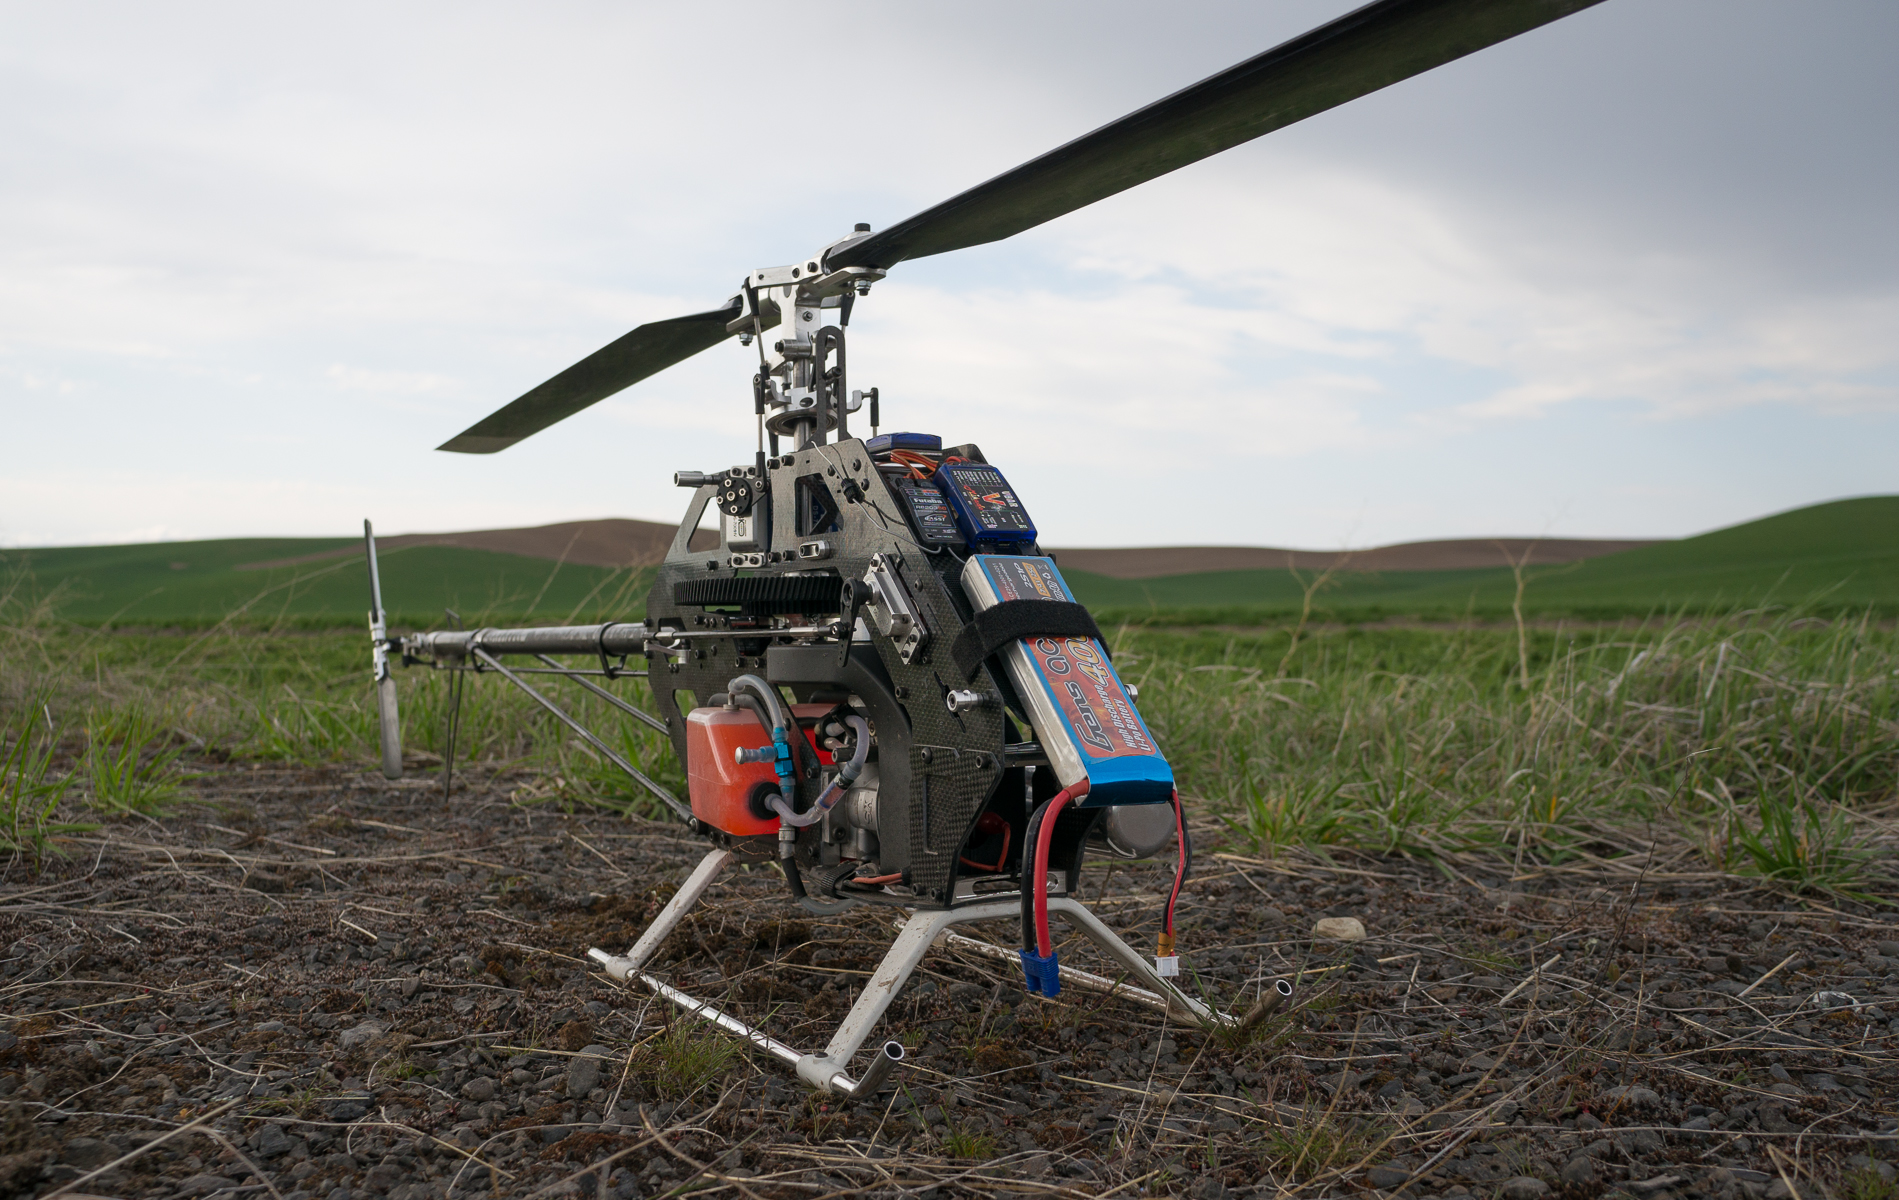
With this heli, the theme seems to be precision, as all of the parts are going together great and the build is extremely enjoyable so far. I reach the part of the build where it is time to start wiring up the heli and installing my electronics. For this review my setup is as follows:
- BK 7001HV Cyclic Servos
- BK 7005HV Tail Servo
- Align throttle servo
- Full-sized Vbar
- Vbar governor with Align sensor
- Gens ace 2S 4000mah lipo
- PushGlo
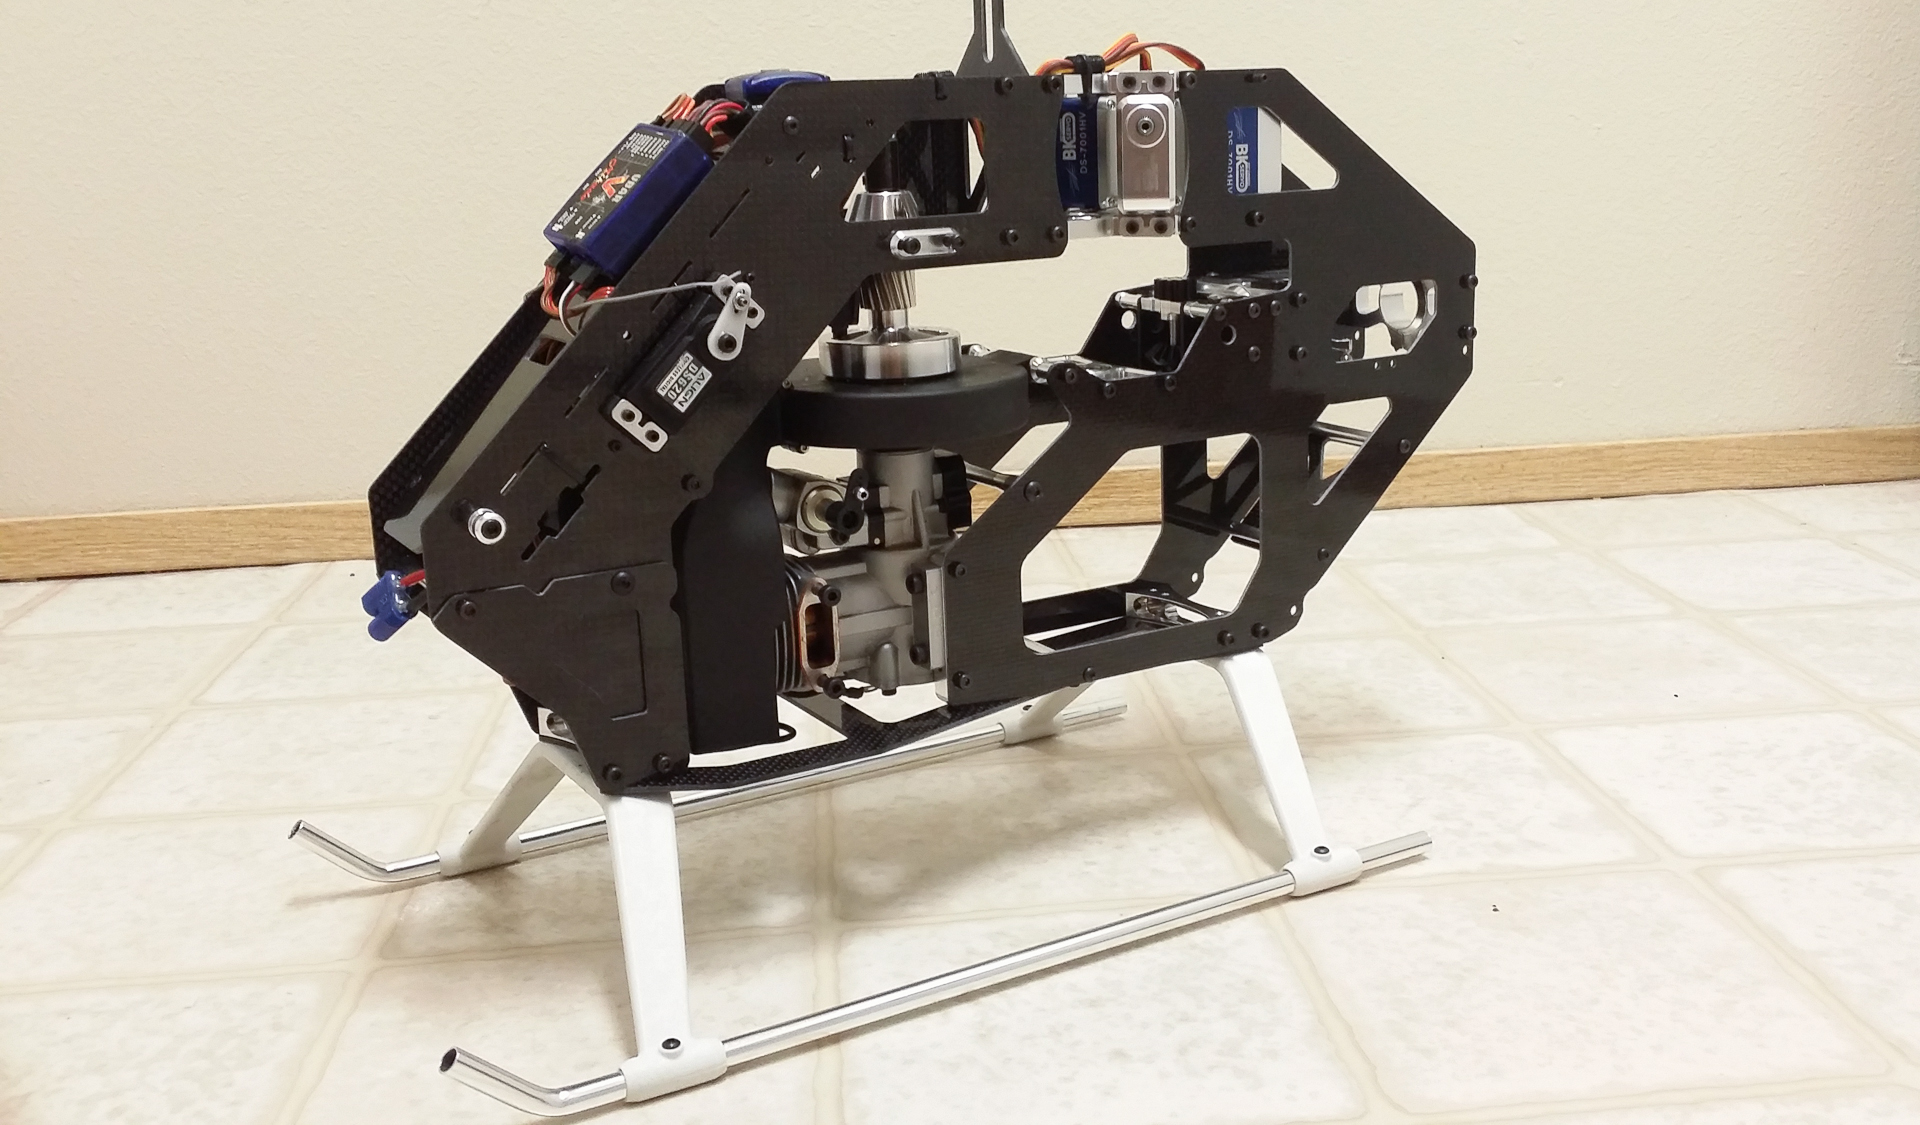
I immediately love how open the airframe is on the N7 and none of the electronics seem crammed in to the airframe. Coming from a Trex 700N this is a nice surprise, as with the 700N space was at a premium and all the electronics seemed crammed into the heli. This gave me the ability to easily route all of my wires up to the front of the heli and keep them mostly hidden. Having the ability for neat and tidy wiring is a huge plus!
The other thing to note is there are multiple small holes to help attach wires to the frame and keep the wiring nice and clean. It seems like too many helis out there have great designs but they miss the small things such as where are we going to run wires and how are we supposed to attach them to the frame? Everything with this heli is very well thought out which makes the build that much faster and enjoyable. This heli has a very large presence and it immediately feels larger than my Align. Now, when the helis are side by side, the N7 is only slightly larger but this electronics layout really makes it feel much larger and more open.
Once I had the frame mostly together and nearly all of the electronics installed, I moved on to the tail pushrod and the boom supports. When the kit comes from the factory, none of the ends are glued on to the boom supports or the pushrods. For these, you are going to need some high quality epoxy to secure the ends, so I chose to use full strength JB weld. Just be sure to sand the ends of the carbon fiber rods before you epoxy them. During this step, I used plenty of epoxy then made sure each part was properly aligned before leaving it to harden. Honestly this part made me a little uncomfortable as a failure to a pushrod could be catastrophic. But I just made sure to take my time and follow each direction carefully and so far I have not had any issues with the pushrods.
Moving back to tail, I chose to use white lithium grease in the thrust bearings as I do with all of my helis. In the manual you will notice option to pin the tail case on the boom or to just rely on the clamp. To be safe, I decided to drill the boom and pin it. In my opinion, I don’t see any reason why you wouldn’t want to pin the tail case. I feel it is only going to add another layer of protection and so far I haven’t had any issues with this.
I should point out that on the N7 tail spins in a direction opposite of all of the other helis I have built and owned. This got me the first time I installed the blades, which also led me to setting up the gyro backwards. Luckily, I caught this before the heli ever left the ground, but it could have made for a very exciting maiden. On all of my other helis when you are looking at the right side or the side the tail output shaft is on the head spins clockwise and the tail spins counter-clockwise. Well with this one the head spins clockwise and the tail blades spin clockwise as well. Now this is not going to affect performance in any way because the tail is still leading edge control so there is nothing to worry about! When installing the tail blades, just make sure the tail control is leading edge and the tail blades are on correctly and you shouldn’t have a problem.
At this point in the build, it’s time to install the main gear which means I can now set the gear mesh and finalize the motor and clutch installation. This part of the build did take some time as it is very crucial to make sure the motor output shaft and the clutch stack are properly aligned so you don’t put unnecessary forces on the bearings and cause them to wear out prematurely. First thing I noticed is that the motor has very little to no adjustment so I went ahead and tightened down two of the four screws – one on each side that hold in the motor.
Now to make sure the clutch assembly is in the correct spot I use a drill and put my nitro starter wand on it. I then spin over the clutch in the clockwise direction so I don’t engage the motor but i’m still spinning the clutch one way bearing. As long as none of the clutch screws are tight the clutch will move to the spot of least resistance, which is where the motor will be best aligned. So as I turn the clutch, I proceed to tighten down one of the screws and continue doing this until they are all tight. Once the clutch is tight, I then check the pinion to main gear mesh. In this case the mesh was way too tight with no backlash at all. This how I knew that I needed to shim the motor. I used shims and them behind each side of the motor then I went through the same procedure again and this time the main gear mesh came out perfect with just a very slight amount of backlash. So when you build this heli just be sure to check to see if you need to shim the motor or not.
The last major thing to build is the head, which, like the rest of the kit is completely unassembled. Once again I chose to use white lithium grease on the thrust bearings and I use a thick silicon grease on the dampers since this won’t ruin the rubber. When taking a close look at this head, you can really see the quality of this heli. The fit and finish on the head was near perfect. I was able to assemble the entire head and really crank down on the spindle bolts while the blade grips remained 100% free and loose. After sliding the head on and putting in the jesus bolt, I moved on to the next step.
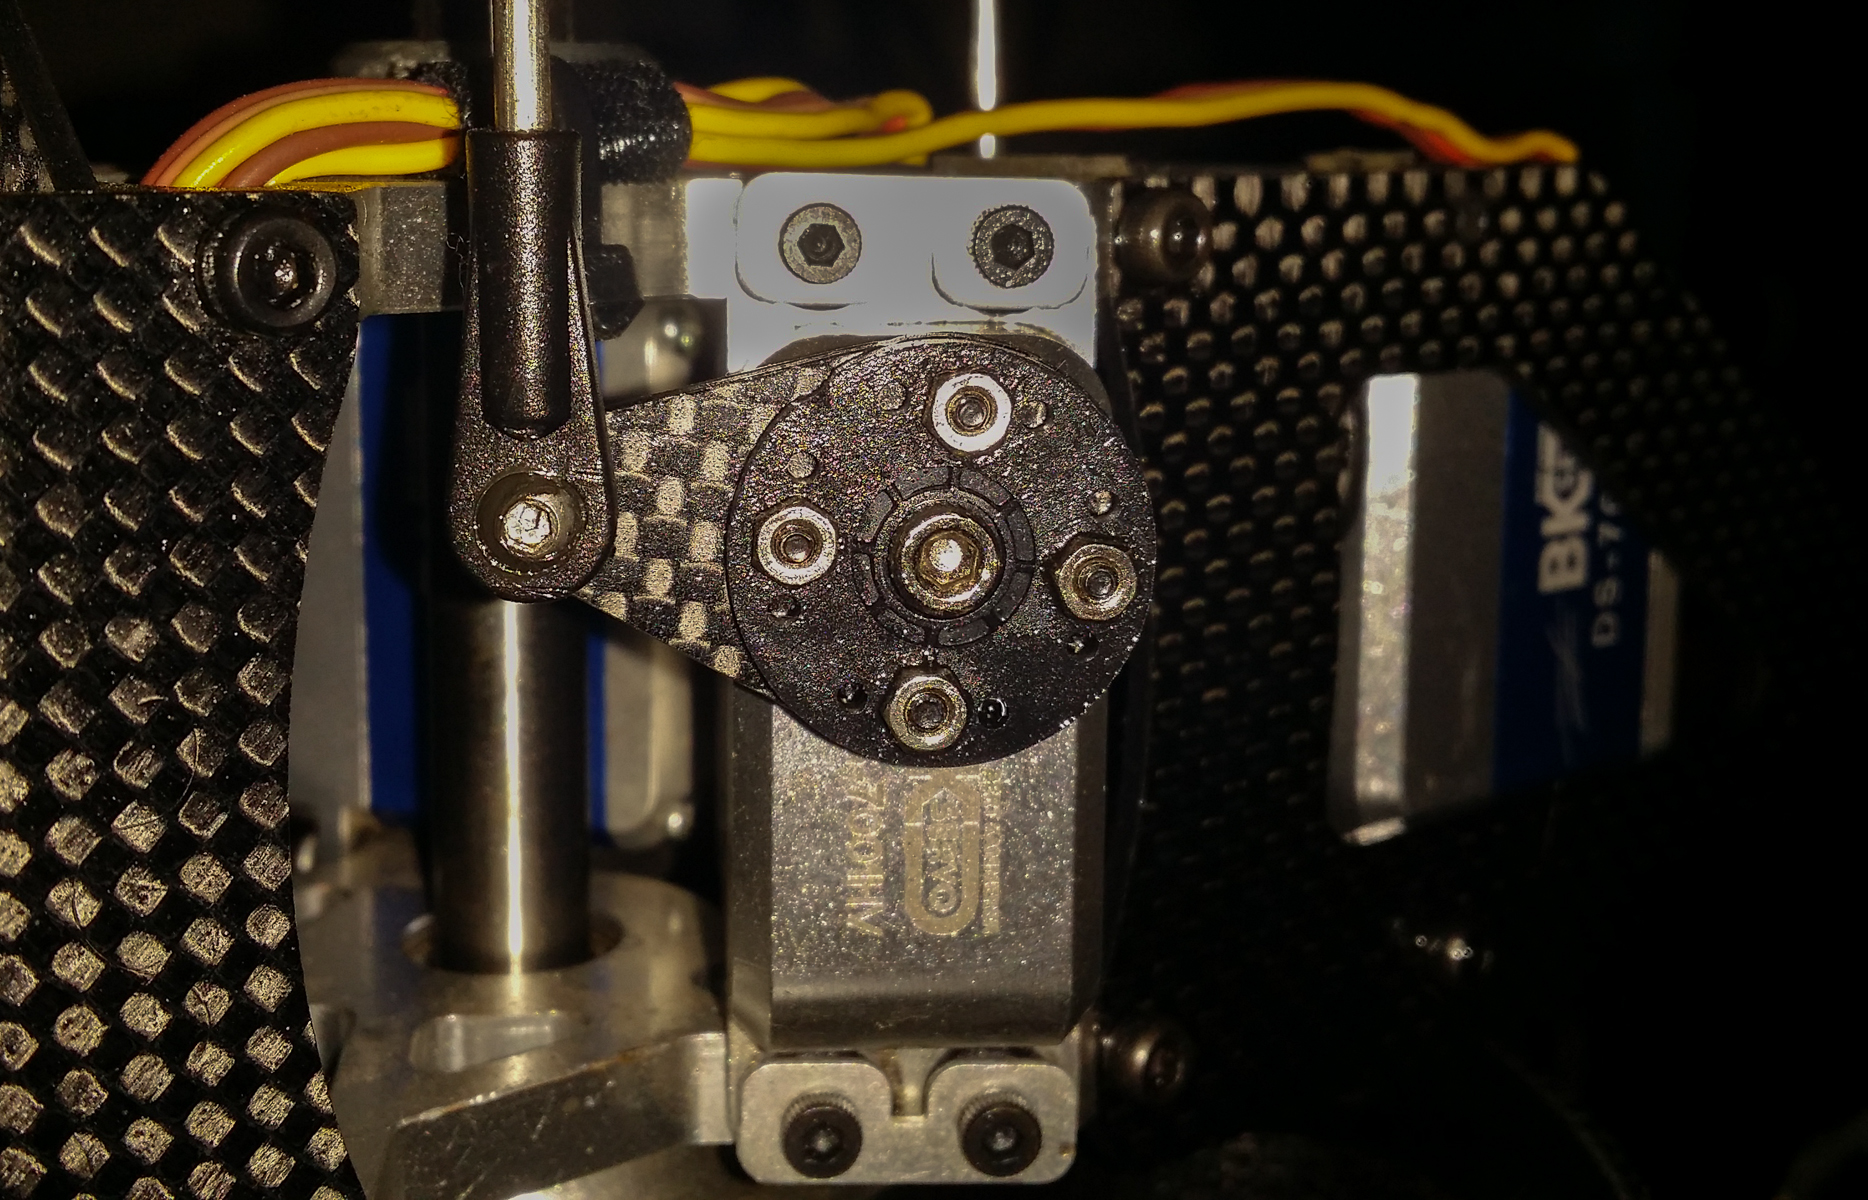
At this point this thing is really starting to look like a heli and it’s about time to start setting up some electronics. This brings me to one of my favorite features – servo horns. This design is absolutely genius and in my opinion the best one on the market since you can use cheap plastic servo horns. This is made possible by a carbon fiber piece that screws to a plastic servo horn using 4 M2 screws. This setup ensures that you have the correct geometry and provides plenty of strength. This is one part I usually hate about building a new heli is trying to decide which servo horns I’m going to use. You have to consider strength, geometry, material and of course cost. Well, with the N7 there is no need to worry about any of that because this awesome design takes care of all those issues. The best part is that in a crash you will most likely only strip out the servo horn splines instead of your precious servo gears which is a huge money saver. Don’t ask me how I know this…
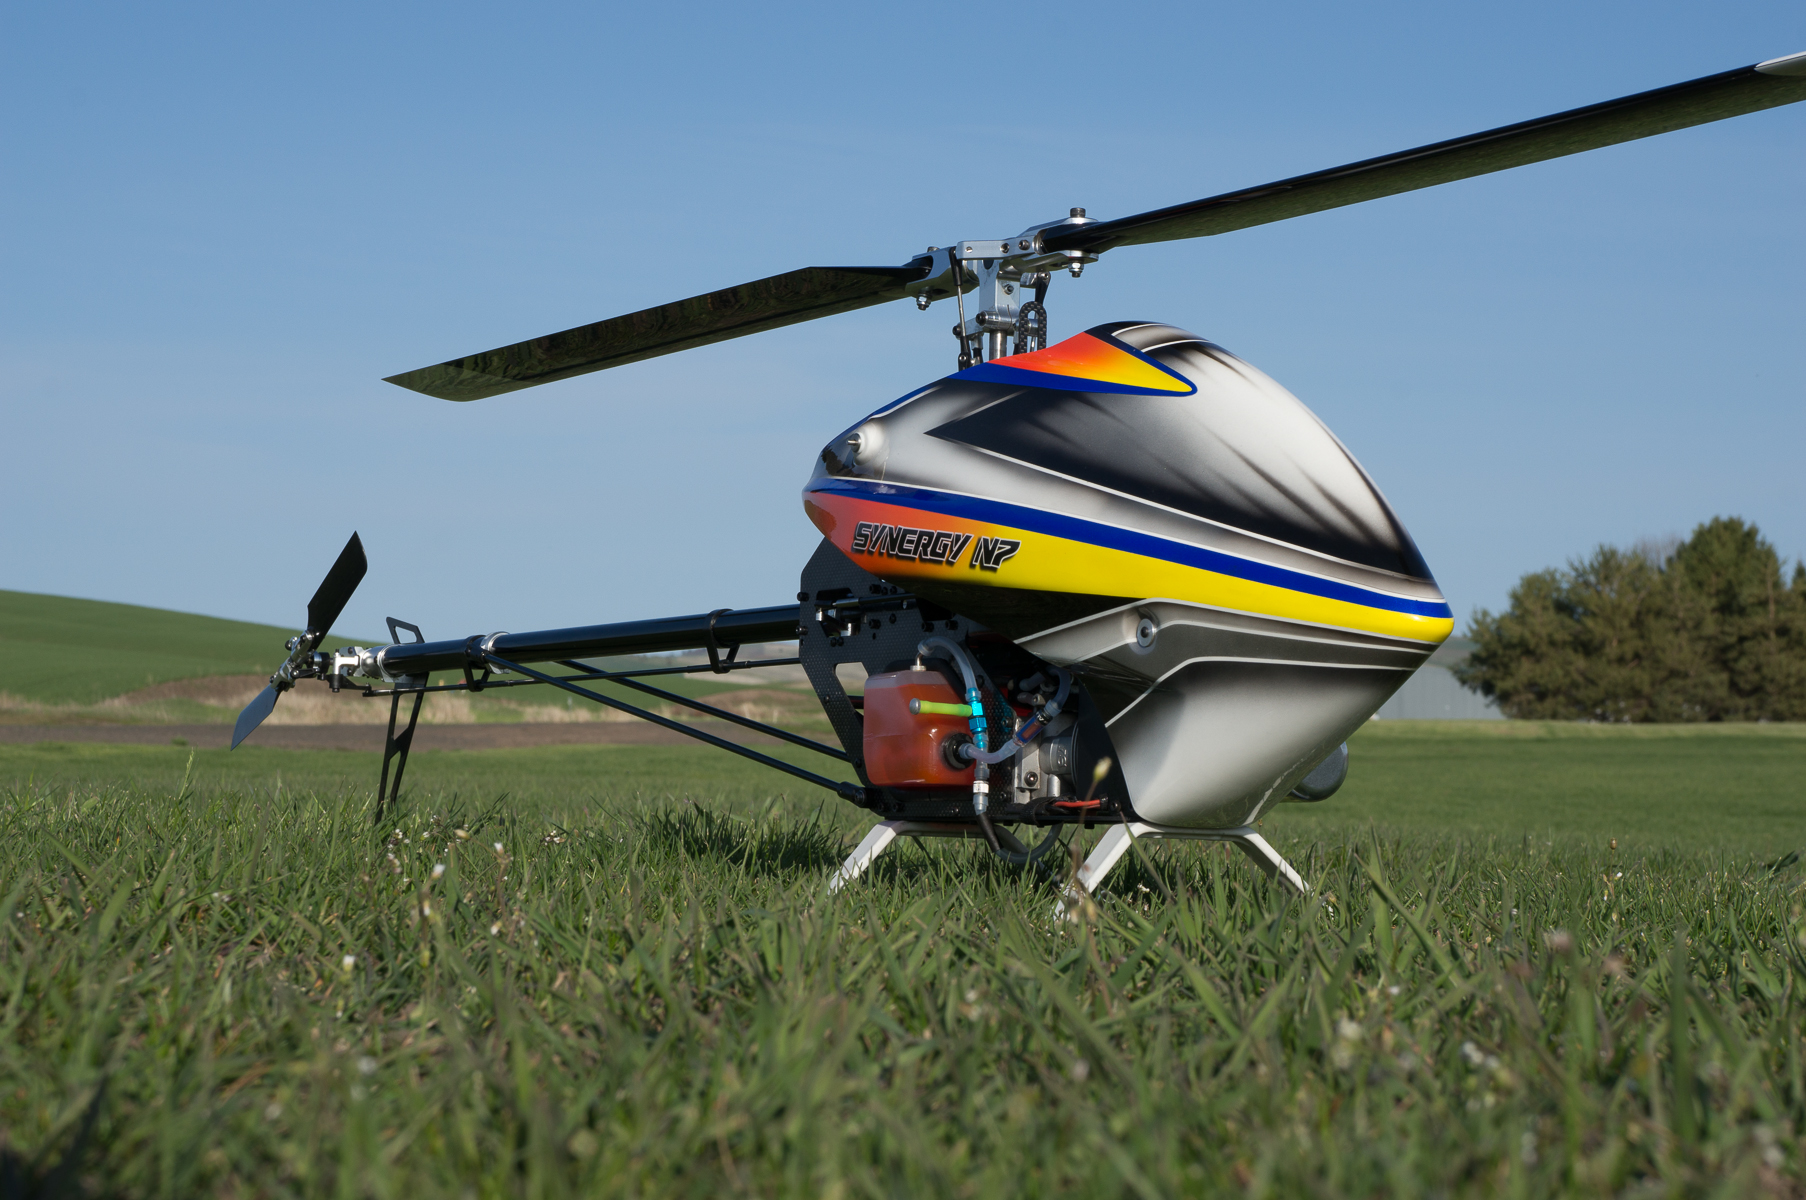
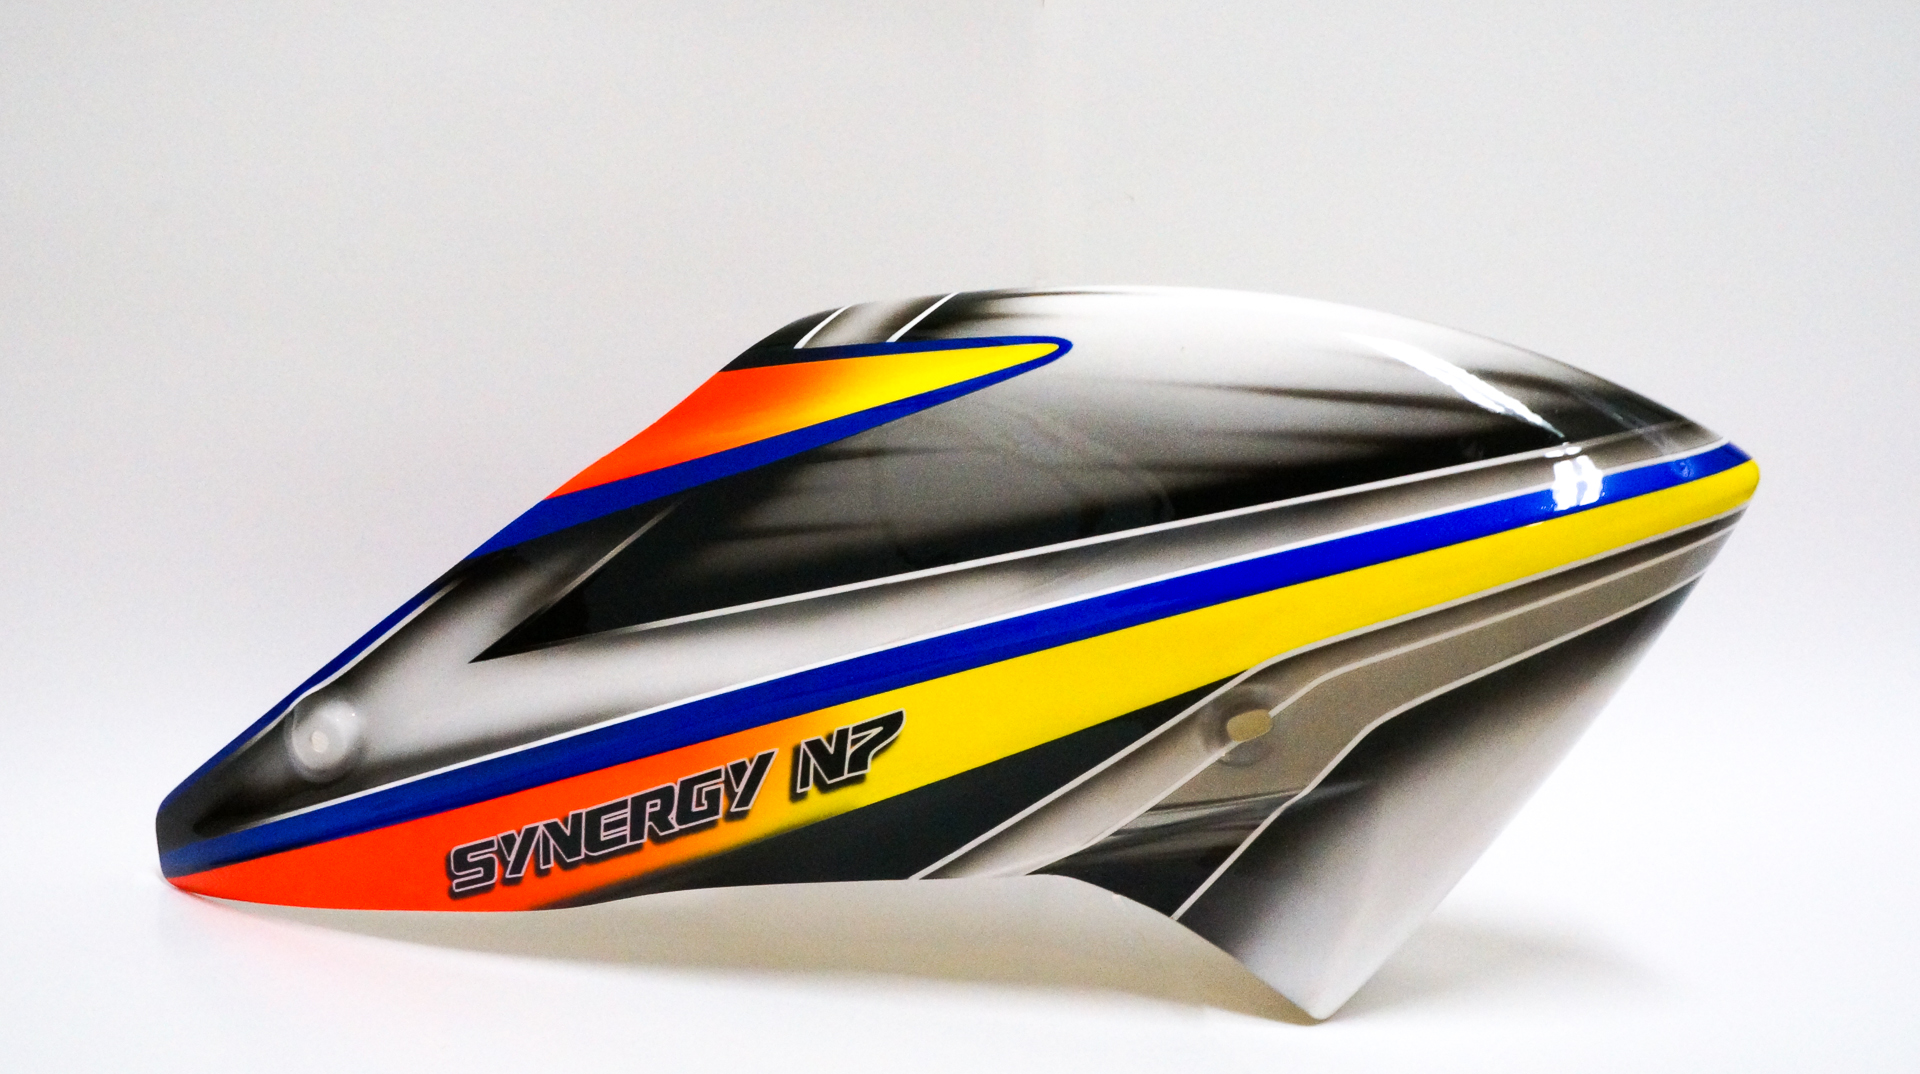
The last part of the build is to put the canopy on the airframe. Personally I love the shape and look of this canopy and I think Matt nailed the color scheme. The colors should help greatly on those clouds days and making sure I don’t lose orientation, I can already tell this is going to help me avoid some crashes! When you put the canopy on the heli and look at it from the front there are some very cool accent lines that go down the side of the canopy and really give this heli a unique look.
When I put the canopy on, it did rub the main gear ever so slightly. This is almost to be expected because a slight amount of pressure on the canopy during shipping and transportation can cause these things to be deformed. So to take care of this, I left the canopy on the heli and put a towel between it and the main gear, then I proceeded to use a heat gun to slowly warm the canopy. Just be very careful not to apply too much heat as you can ruin the canopy. Then once the canopy is warm, I just let it sit for about 30 minutes to make sure it completely cools down and it maintains its new shape. After this initial reshaping I haven’t had any rubbing issues.
Setup was very uneventful which is to be expected once you’ve setup a Vbar numerous times. This heli was extremely easy to setup though since it’s a direct to swash design and getting everything at a perfect 90 degrees is very straightforward. Lastly just be sure to spend some extra time on the tail setup and make sure the pivot arm near the back of the frame is at 90 degrees. This will just help ensure the tail setup is perfect which will lead to a much easier tune and better tail performance. One thing I will point out is be sure to center all of the servos before you screw them in to the airframe for good. This is most important on the elevator servo since after the servo is installed there is no way to put the screw in to the servo output shaft to hold the horn on.

Before completing setup I found that I needed to go around the entire heli and size all of the links. Usually if the links are just a little tight I will just let them break in…especially with a nitro given all the oil that gets everywhere. With this heli you will want to make sure you buy a correct size ball link sizer because the N7 uses larger balls than most 700-sized helis. Now I should point out having to size the links is not a bad thing because this means I get to make sure each link has zero slop and operates smoothly. It does add a little bit of time to the build but nothing to worry about.
I mentioned in my setup that I am using a 2S 4000mAh receiver pack – for my setup, this is the weight that is required to achieve proper CG with the canopy installed on my model. What I will do with a new heli is wait until I have completed the build before I order a receiver pack. The reason for this is so I can buy the correct size pack that will properly balance my heli. In my case I needed to add about a half of a pound to the nose of the helicopter to achieve proper CG. This can change slightly depending on your setup but not too much. Now, at first this actually kind of made me mad because, to me, this feels like a lot of unnecessary weight on the heli. We are talking about a half a pound not just a few grams! But once I weighed the ready-to-fly heli, I felt a ton better as the overall model still ended up being very light.
In addition it is awesome to head to the field and not have to worry about charging a receiver pack every two flights because this thing can go all day. There have been a couple occasions where I didn’t even bring my charging set up to the field. All I needed was some nitro, my transmitter, and a starter to fly the better part of a day.
Overall the build went extremely fast and didn’t take much time at all. This heli is very well thought out and I didn’t find myself having to go back and take apart assemblies that I had already built – I was consistently just moving forward. There are tons of neat little features such as holes cut in the carbon fiber so you can access screws that are located in between the frames and of course the fantastic servo horn design. Having a well-written, colorful manual really helped with the entire building process as well. Building these higher quality kits really is a whole new ball game, as they do require slightly more work on the pilot’s part. But in the end they tend to turn out great and you have a heli that’s ready to go. The N7 is no exception!
Performance and Tuning
The first couple flights on every new heli are dedicated mainly to tuning and motor break in. Luckily with this heli the motor is already broken in so I don’t have to worry about that. Now the maiden flight on this heli was almost very eventful… When I was doing my final bench check before the first flight, I noticed that I had the tail gyro compensation going the wrong way. So I plugged her back into the computer and got this fixed right away. Other than this the maiden flight went great.
The first thing I remember noticing is how tight and locked the heli felt and this is without even changing any gains yet. The first half of the maiden flight I slowly cruised the heli around, but by the end I was throwing the thing around like it was my hundredth flight on the model. In a nutshell, I was able to get the head gain quite high with zero bobbles since this model is so light. As some Vbar users know sometimes the tail can be a little bit of a pain to get dialed in, but with 115 tail blades on there I was able to get the tail extremely dialed with just a few adjustments. For my flying style, I prefer the more “sim-like” feel so I always crank the style slider up and add a little bit of paddle sim. With these adjustments I had the heli flying pretty darned good.
One thing I want to note is don’t skimp out on tuning your governor and making sure your engine is properly tuned. A poorly tuned engine or governor can make the entire heli fly like crap. I decided to go with the Vbar gov on my setup and I have it flying extremely well, but the gov can only work well if the engine tune is close. So just as a tip before you blame any negative characteristics on the heli be sure you motor and governor are good to go.
By now I am sure many of you are wondering “so how does it fly once it’s all tuned?” Many of you know I’m a nitro guy, so when comparing this heli to an electric model I may be a little biased. 🙂 To be fair, I will mainly be comparing the model to my previous nitro – an align 700N. But for those of you that want to know I would fly this heli over an electric any day! It’s just too bad fuel is so expensive!

Once I managed to get the N7 all tuned, the flight performance got even better. To start with, the tail is very tight and locked in. Some of this this probably due to the 4.9:1 tail ratio and that i’m running 115 tail blades. The 4.9:1 ratio is extremely high for a 700 class heli but it’s a great feature. This allows you to run a wide range of tail blades and still have plenty of tail authority. The tail held solid through anything I could through at this heli – pirouetting loops, piro flip reversals…you name it! There is also zero hesitation when changing the direction of a full stick piro and the mechanics all held up fine.
In my opinion the Synergy head is bulletproof and works extremely well. It comes with a more traditional style head which includes a swash driver. Personally I really like the traditional head as it allows you to run a very wide rage of head speeds and in general it’s easier to tune. You couple this with a getting the CG just perfect and you get a very responsive and crisp feeling heli. One thing I love about this heli is the cyclic and collective response. The heli has zero lag which gives me a very connected feeling on the sticks. This is the main reason why this heli is so much fun to fly.
To be able to push the limits of my flying ability I need to have that connected feeling and know that the heli is going to respond as soon as I give input. I can say I achieved that with this heli. When I fly the N7 I find myself flying it harder than most of the other helis I own all because I feel so connected to the heli while i’m flying. Just remember this was with a Vbar on there, but I have no doubt you can get this heli flying like this on any of the common flybarless units.
Let’s not forget about autos! I always love doing autos with a nitro because of the hang time you can get. So when it comes to the overall performance of a helicopter this is one category I definitely consider. When taking in to account the weight of the model and the fact that I’m running 700mm blades the auto performance was amazing. I was easily able to bring the heli in fast or just float it down and have enough head speed to land. The N7 is the perfect platform whether you are just learning to do autos or very experienced. I have to admit I’m not the best at inverted autos – most of the time, I’m just barely pulling them off, but with the N7, I found normal inverted autos to be a breeze. I could bring the heli down inverted and perform an elevator flip and every single time I had enough head speed to land.
I tend to fly helis without the canopy this has just been a preference I’ve adopted. Now if the lighting is really bad of the sky is very cloudy I will fly with the canopy on. So the weight of my current setup without fuel and no receiver pack is 8.98lbs. My Gens Ace receiver pack weighs half of a pound (8oz) and the heli holds 0.91lbs of fuel. This brings my flying setup with no canopy and full of fuel to a weight of 10.38lbs. Most people will fly with the canopy though, which weighs an additional 0.45lbs. When we add all of this together this brings the total weight to 10.84lbs.
This number can vary some depending on how many bells and whistles you like to run. I tend to keep my heli pretty bare bones and just stick to the basics, but to each his own. When considering the size of the model and the presence it has in the air I am extremely pleased with the all up weight of my model. I have to admit that when I read the advertised weight of this model I was a little skeptical, but now that I’ve built one and weighed it myself I can see how it would be possible to get the bare-bones heli down to 9.5lbs.
It seems that most helis on the market get a flying style associated with them. Some helis are known for their big air while some might be recognized for how well it handles hardcore 3D smack. What I found with the N7 is that it can handle a wide variety of styles not limiting it to a specific type of pilot. I tend to think of myself as a smooth 3D pilot that has some maneuvers on the deck while throwing in some big air every now and then. I also have a couple harder moves to really push the heli and see what it’s got. Having 13.5 degrees of pitch I was able to get the heli moving and in big air maneuvers the heli tracked extremely well. When on the deck the heli felt tight and responsive perfect for really throwing it around. Another nice feature is the flight time. It didn’t seem to matter what type of flying I did – I was always able to get around 5 minutes and 45 seconds of flight time. So no matter what type of pilot you are or what your skill level is, I feel the N7 has something to offer every pilot.
Here at the Nation, we like to be very thorough with our reviews and that means a crash test. Okay, honestly this wasn’t planned, but since it happened I’m going to share my findings. What happened was during flight I lost the tail on the heli and as you can guess this didn’t end to well. Im not 100% sure what exactly happened, but what I did find was a missing pin the front torque tube transmission assembly. This pin holds one of the torque tube gears on to the shaft and is held in place by a small set screw that threads into the sme shaft. When I got the heli home I discovered the missing pin and this is the obvious source of the failure. There are a couple things that could have caused this. The first one is I may not have properly tightened down the set screw during the build and the second is I may not have used enough Loctite or cleaned the screw well enough before applying Loctite. Either way this is a chance for me to say again, follow all of the small tips and trick in the manual. They are there to help you!
As I expected this heli crashed extremely well considering it went it tail first then rolled over to the head. When I initially saw this heli crash I was honestly expecting the worse. I did happen to hit throttle hold before the N7 hit the ground, but none the less it still made quite a thud when it hit. In most cases, this is never followed by good news. Upon further inspection, not nearly as many parts were bent and broken as I originally thought. All of the usual suspects broke in the crash including tail boom, torque tube, boom supports, tail output shaft, tail hub, feathering shaft, tail pivot arm and of course main blades. Luckily, I didn’t have the canopy so that remains in pristine condition.
After this crash I can honestly tell you my confidence with this heli has increased and I started flying even lower because I know it’s going to crash extremely well. This is very important for me because as I try to progress and push my flying to the next level, crashing is inevitable. That crashing doesn’t have to mean re-kits and buying ton and tons of parts. I feel the N7 is going to be a perfect platform to support progression for this very reason.
When it came to buying parts to get my heli back in the air I was pleased when I found all the parts I needed in stock. Parts can be ordered for this heli directly through the Synergy website. They had great service and the parts were in the mail the very next day after I placed the order. One thing you will notice is the part prices might be a little more than what you are used to. At first I thought this could be a potential issue since this could make for some spendy crashes. But I honestly feel the high parts prices are evenly offset with a solid design that crashes extremely well. Sure the parts might cost you a little more but I guarantee you will break less in a crash. So in the end i’m really not too concerned with the prices, but for some this may be something to consider.
Now that I’ve had this heli for quite some time I have had the opportunity to put a fair amount of flights on it, about 70. This has given me an idea about the general day-to-day maintenance this heli requires to keep it in the air. I am pleased to say that for the most part my heli has required little to no maintenance. So far none of the parts seem to be showing signs of wear. All of the links are still tight and the tail has very little slop. So with 70 flights on the model and not having replaced a single link this heli gets a thumbs up from me!
Now we know that not every model is perfect and this one is no exception. I have had to do a couple small fixes here and there but nothing too major. The first thing I had to do was pin the tail boom supports. It took about 30 flights but eventually the carbon fiber rod was loose in the plastic ends on one of the boom supports. After this slight fix i’ve not had any more issues.
In my opinion the quality of the Synergy N7 and parts is hard to beat. This heli has a larger presence in the air then my 700N did and let’s face it…size matters. It may not be that much larger but when it comes to maintaining orientation in the sky every little bit helps. Another thing that I hadn’t even considered is the fuel tank size and how many flights I get per gallon. The N7 has a slightly smaller fuel tank then my old 700N. For this reason I can get more flights per gallon. For me a 5 minute and 45 second flight is long enough and i’ve probably ran out of moves to do so ill gladly take another couple flights per gallon.
The N7 is very unique in that it is a very tight and locked in heli that’s extremely fast. Now don’t get me wrong the 700N was no slouch but the subtle differences in collective response and overall feel put the N7 ahead. Now for some due to price and other circumstances upgrading just might not be feasible, but if you can swing it I don’t think you’ll be disappointed.
To wrap this thing up I really had a ton of fun with this heli. It was a great build and a model that I still fly every single time I’m at the field. There is no question that this heli will be in my fleet for quite some time. So to anyone on the fence about this heli or someone looking for a new build hopefully this review has been helpful. Once again, thanks to Matt Botos and Synergy for giving us this opportunity and if you have any questions, shoot me an email at !
– Jessie