The 3Digi has recently received a fully functioning governor with firmware/software V1.2. Make sure you go to www.3Digi.de/en and click downloads. Scroll to the bottom of the page and download the newest version of the terminal software. When you attempt to connect your 3Digi to the terminal software it will tell you firmware is outdated and must be updated.
First things first, BLADES MUST BE OFF FOR THIS PROCESS. You will be working with a live helicopter on the bench so safety is priority one. Remove BOTH MAIN and TAIL blades before moving on.
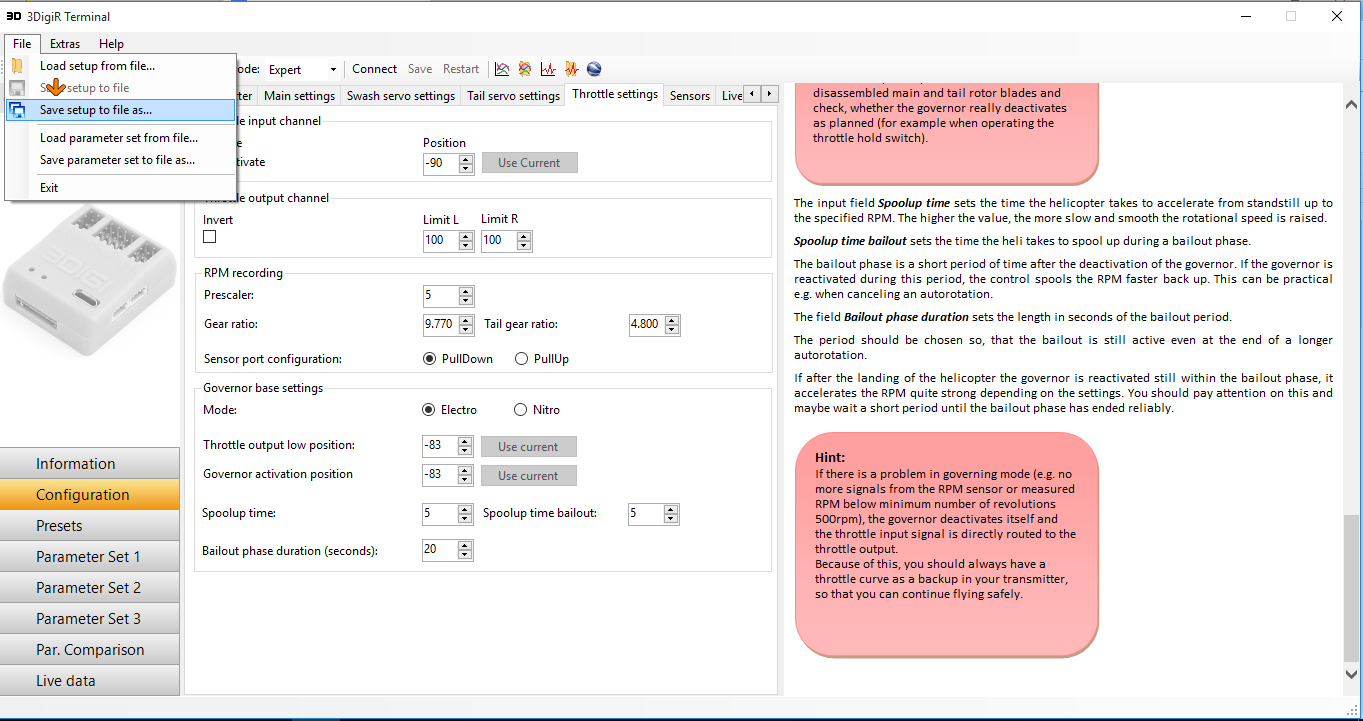
First click on File > Save setup file. Save your setup file in a place you will easily find it.
Next click on Extras > Firmware Update….
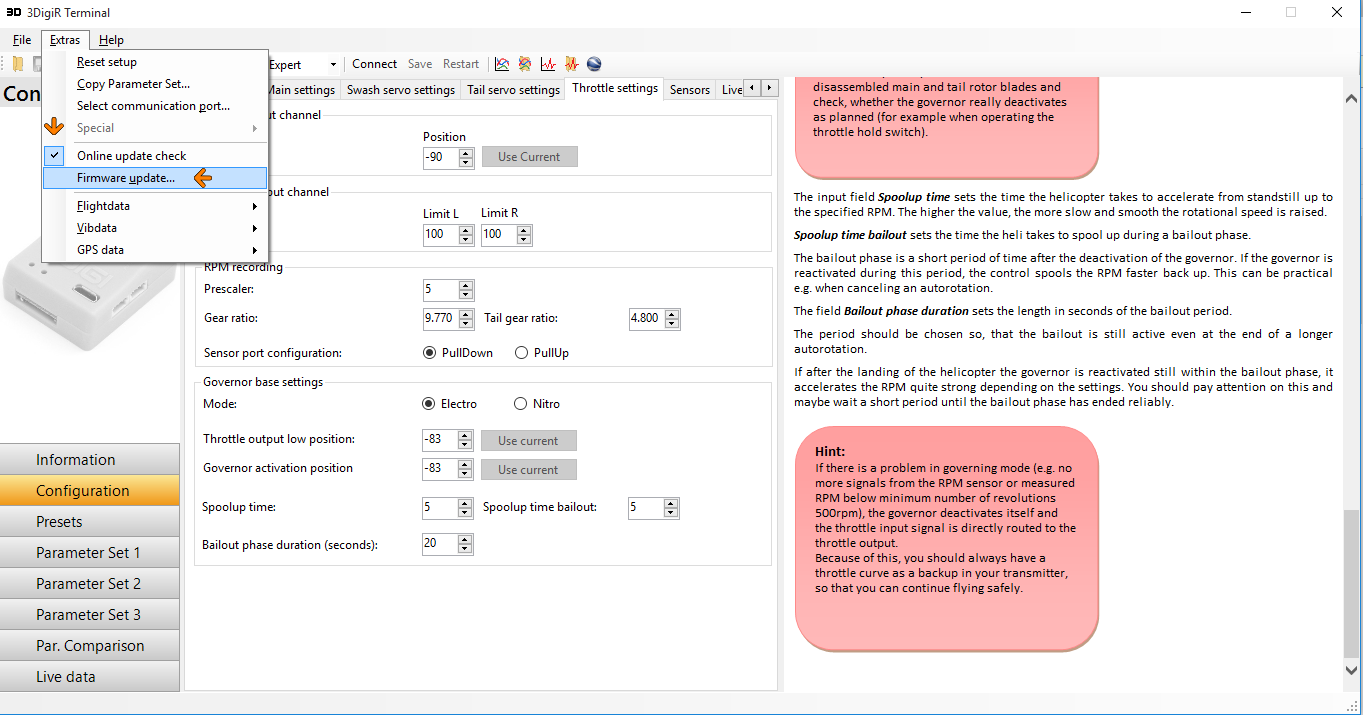
The next dialog will ask you for the source of the update. Select the top option, “Update with Online Version”. Now click OK, once started the process takes about 95 seconds.
Now that you have loaded new firmware the 3Digi will ask you to do a first time setup. Allow the 3Digi to do this, then click File > Load setup file and load the file you just saved. I would recommend going through and checking all of your settings. One of my 3Digi FBL units loaded all settings back to normal, and one did not.
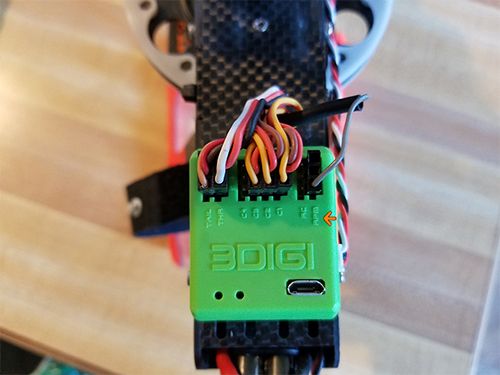
Now you are ready to setup the gov in the 3Digi and we need to prep the Hobbywing V3 ESC. Disconnect and power down the 3Dig, now is the perfect time to make sure that you have the RPM signal wire from the HW V3 plugged into the 3Digi FBL. Note: The Hobbywing RPM signal wire is yellow, mine has been spliced and is now gray.
Connect your HW V3 ESC to the HW USB link software. Make sure you are updated to the latest firmware for both your programming box and your ESC. Set up your timing and frequency to your preference or motor manufacturer recommended specs. Set the ESC to Fixed-wing mode with no autorotation bailout, this will be handled by the 3Digi.
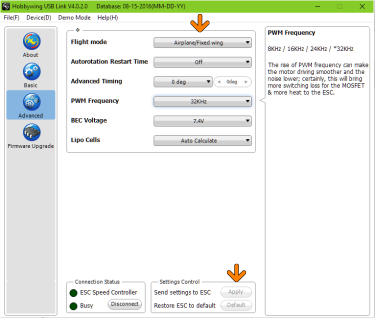
Apply your settings to the ESC and we are done with the HW software now.
Set up a linear throttle curve in your transmitter from 0-100 (or -100-100).
Make sure your Throttle Hold is set up for a 0% flat curve.
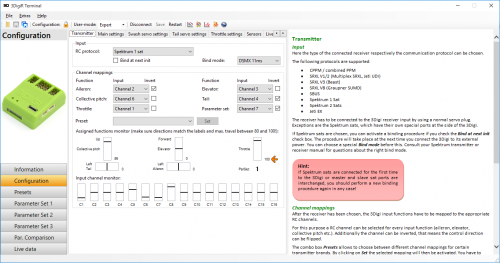
Reconnect your 3Digi to the terminal software. Go into Configuration > Transmitter
Adjust your endpoints in your transmitter until the 3Digi shows 100 in both directions for throttle travel using the “normal mode” Throttle curve you just set up.

Place collective stick at full throttle.
Turn Throttle Hold off.
Plug in flight pack(s).
The HW V3 ESC will issue 2 shorts beeps, immediately move the collective stick all the way down. The ESC will now issue cell count beeps and arming tone.
Activate throttle hold immediately as the heli is now armed in and in airplane mode.
Go to the configuration tab of the 3Digi and select the “Throttle settings” tab. Under RPM recording input the prescaler value, which is your motor poles/2 or the amount of magnets used with an IC engine sensor. Next, enter the gear ratio of your helicopter. If you already entered this information for logging purposes before the information should still be here. For an electric heli select pulldown, for an IC engine sensor select pullup for the governor port configuration.
Now move your throttle stick all the way down and ensure that you are in the flight mode with the linear throttle curve. Turn off Throttle Hold. Push up on throttle trim until the motor just starts to turn. Back the trim off 3 clicks. Now click “Use Current” for both Throttle output low position, and the Governor activation position. Now click the the down arrow next to Governor activation position twice.

Set the spoolup and bailout timers to your preference. Since the ESC is set to Airplance/fixed wing mode the 3Digi will handle the soft-start on the ESC. Spoolup time is the initial time it will take for the first spoolup of the model. Bailout spoolup time is how long it will take to spoolup in autobailout mode. The Bailout phase duration controls how long the 3Digi will remain in autobailout mode. Right now it maxes out at 20 seconds.
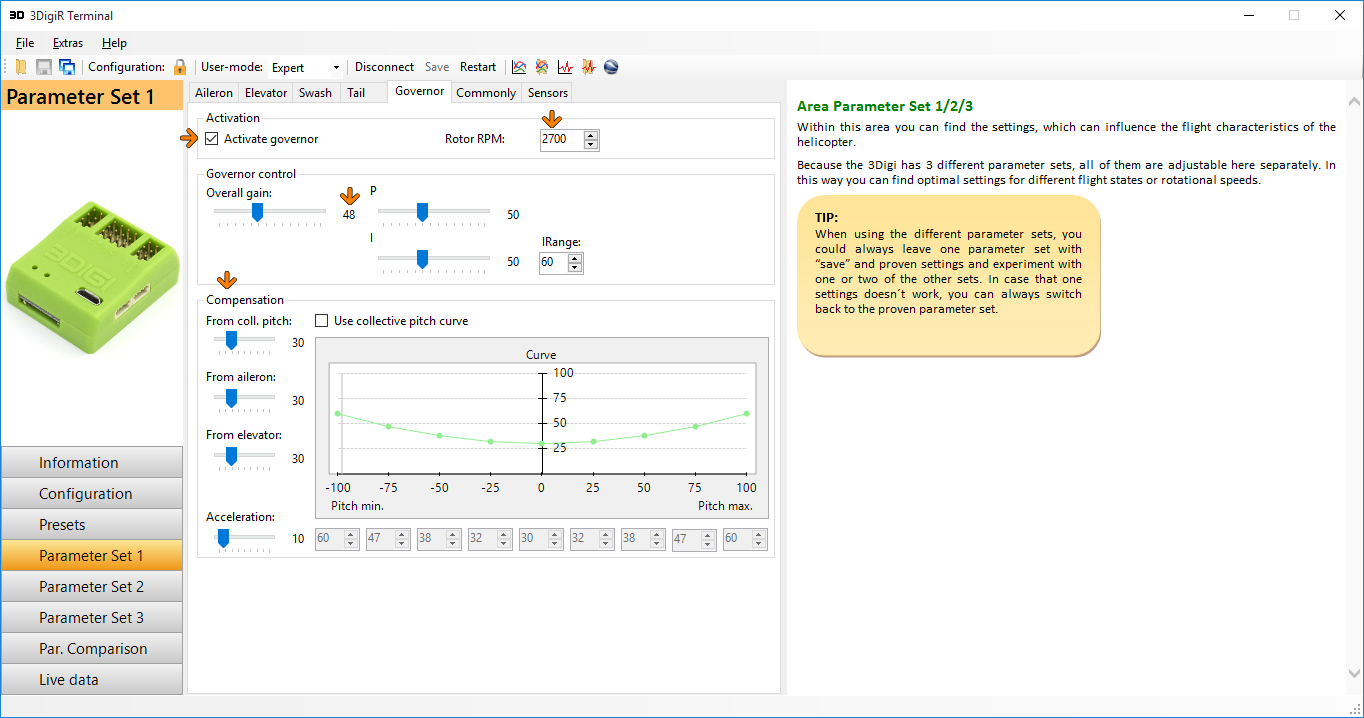
Go to Parameter set 1 > “Governor” tab. Click the checkbox to activate the governor. Input your desired headspeed into the box. I would recommend lowering the Gov gain a little bit as the stock setting seemed a little bit aggressive. There is also precompensation available on this tab for Aileron, Elevator and Collective pitch. The Acceleration parameter acts is there to give your throttle a little extra boost when the 3Digi gets a hard cyclic or collective command. You can now go into your other 2 Parameter sets and activate and input the Gov values from there.
Back in your transmitter just set up your flight modes with flat throttle curves of 50%. You will not need to switch flight modes, aside from activating throttle hold because your head speeds are tied to the different parameter sets and your 3Digi governor will be active at first spoolup.
You can check rpm accuracy by looking at live data tab or by pulling flight data from card after your first flight.
-Saje
Raz0rSh4rp